Showing posts with label mains. Show all posts

Monday, 15 April 2013

Review - The Junk Food Cooking School, Docklands, Melbourne

A couple of weeks ago I had the pleasure of being asked to join my friend Tanya in a Vietnamese cooking class on a Chinese junk (formerly a brothel moored in Footscray, now casually moored in the harbour at Docklands). Tan's husband, you see, had quite obligingly suffered a bout of gout that week and so I was chosen as the person who would most appreciate it. And boy, did I appreciate his pain. Thanks, Mark! :)
The Junk Food Cooking School is run by a lovely woman named Hazel, and there are classes on various cuisines available throughout the year. I wanted to attend the Mexican class quite badly, but I'm being moved to a FIFO roster at work and am not sure which weekends I will be available to fly back to Melbourne, so I guess I'll have to let that one slide for now. Boo :(

In the meantime, I have done the Good Morning, Vietnam! cooking class and discovered just how simple (and healthy) Vietnamese food is. Because it's been a while since I posted a recipe I'll post my favourite one, but if you want the rest of them you'll jolly well have to attend the class ;) I don't have any qualms in posting this as similar recipes are widely available on the internet and so there are no trade secrets being given away, but I do encourage you to go along to a class. You'll be glad you did.

Two things struck me about the food we cooked: One, even though we made seven different dishes (including dessert), I wasn't completely stuffed full - the food was light, and not at all greasy; and two, the same ingredients were used again and again - chilli, lemongrass, fish sauce, sugar, salt, pepper, vinegar. So it's really not one of those cuisines where you need lots of fiddly things. I don't know about the rest of you, but I already have all of those things in one form or another in regular circulation in my pantry. Now all I need is a garden with some herbs in and I'll be set.

The classes were well-run, and Hazel was open to questions about dietary requirements etc. She has herself been recently diagnosed as caeliac, so I do know that at least the cooking class I did was gluten free and I wouldn't be at all surprised if some of the others were, too.
Our class had around ten people in it, and there was a cooking/prep work/demo table at one end of the junk and a dining table and chairs at the other. We were also given a choice of bubbles, wine or beer to drink (plus water, coffee and tea) with our meal, which I didn't expect and which I thought was a nice touch. You could participate as much or as little as you liked, with everyone standing around the demonstration table and Hazel getting people to participate in various ways. As the class wore on we found that the group naturally involved itself and took it in turns, so Hazel didn't have to do too much directing. I guess we had a good group dynamic.
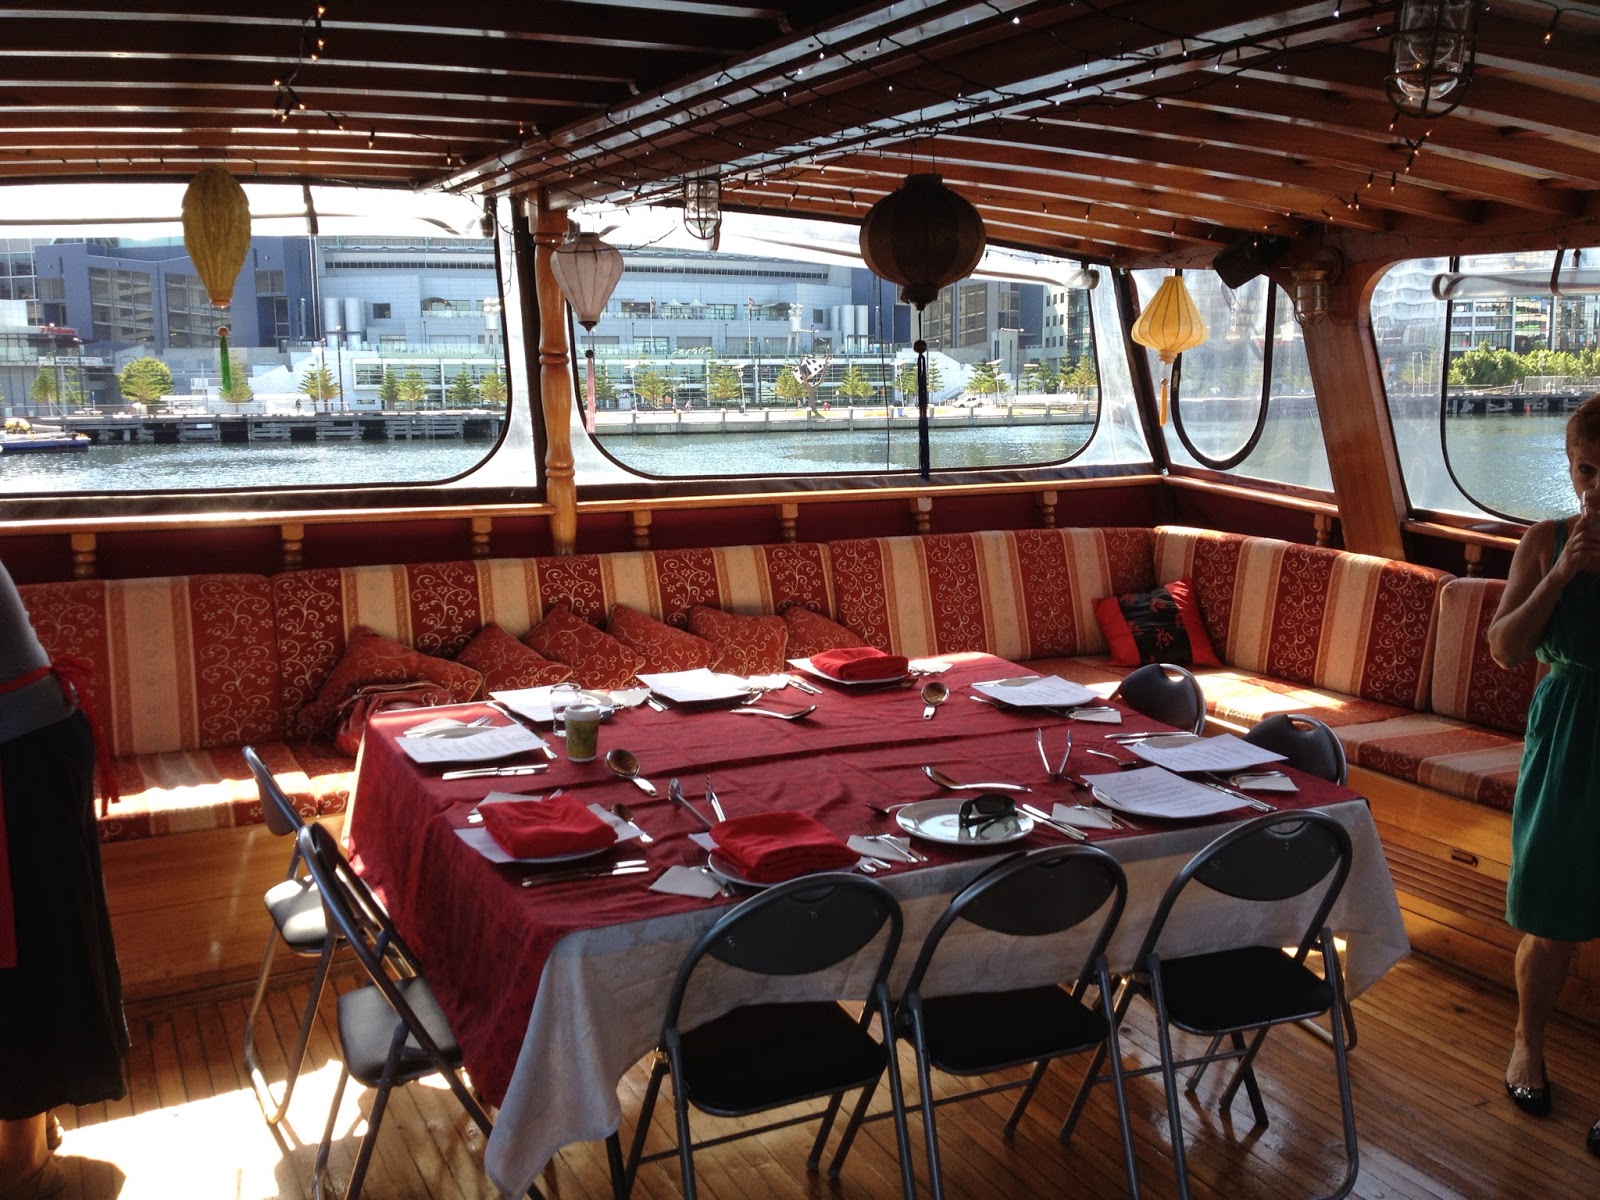
The class lasted four or five hours, including eating the meal and checking out laughing at the buck's night (well, day) boats going in and out of the harbour. You should wear closed-toe, comfortable shoes because you are on your feet for a lot of that time (that, and you don't want to drop a knife or hot oil on your bare foot), but I imagine you could just as easily sit back and watch if you wished. Personally, I'm a more hands-on sort of gal, especially in the kitchen.

Chilli and Lemongrass Curry - The Junk Food Cooking School.
INGREDIENTS:
500g chicken Marylands, chopped into 3 pieces and excess fat and skin removed
1tsp sugar
1/2tsp salt and 1tsp black pepper
2tbsp fish sauce
2tbsp vegetable oil
2 lemongrass stems, white part only finely chopped and pounded, bash remaining ends
2 garlic cloves, crushed
3 birds eye chillies, thinly sliced
90mL water
2 spring onions, sliced on the diagonal
1 bunch Chinese broccoli or other Asian greens
2 birds eye chillis, sliced, to garnish
1/2 bunch coriander leaves, to garnish.

Combine fish sauce with sugar, salt and black pepper. Stir to dissolve sugar.

Add chicken pieces, stir to coat then cover and chill for half an hour.

Meanwhile pound lemongrass in mortar and pestle until it goes powdery. Fry on medium heat until golden.

Pound garlic and add to wok with chilli and cook until fragrant.

Add chicken and marinade and stir-fry for around 10 minutes until coloured. Chicken does not need to be cooked through at this stage. Add water and bashed lemongrass ends and bring to the boil then reduce heat and cook, with lid on, for approx. 20 minutes until the chicken is cooked through.

Just before serving add greens and spring onions and cook a further 2 minutes then serve garnished with chillis and coriander.

It won't look pretty, but you'll be surprised at how rich and flavoursome it is!


We made seven dishes in all - a variation on a rice paper roll, with a prawn and pork sausage in the middle along with herbs, rice noodles and a peanut sauce; sugar cane prawns; pork spareribs braised in coconut water; chicken, chilli and lemongrass curry; coconut rice; green mango salad; and sticky rice to finish off. Today I have shared with you the chicken, chilli and lemongrass curry because it packed such a flavour punch, and also because I was downright shocked that it didn't contain coconut milk - the sauce was just so creamy. It's definitely one going on regular rotation in my kitchen!

Besides the curry we made sugarcane prawns (seen here sitting on a green mango salad)


Pork spareribs braised in coconut water

 Coconut rice

Rice paper rolls with a prawn and pork sausage 

And sticky rice with banana for dessert.
  
What a feast!


 In addition to plenty of food, drinks and a cooking lesson you also get a snazzy red apron as part of your ticket price. Which is just as well because I get an apron grubby just about every time I use it, so multiple aprons are a must in my life!
 I get the impression the classes do book out fairly quickly, so if you want to book several places then plan well in advance. Hazel does run private classes, though, which could be an option for a hen's night or a work function. I'm not sure whether the price is any different, but it would definitely be worth a look. Included in the normal price is the class, the (multi-course) meal, a drink or two, an apron and a booklet of recipes (I assume that applies across the board for all classes), which I think makes it very good value for money. All in all I recommend the Junk Food Cooking School for a nice day out with friends, or as a gift for someone.

Monday, 4 March 2013

Quick 'n' Dirty - Lamb with Chilli and Coriander (Cilantro), with Greek Salad

I realised recently that part of the reason I struggle to post some weeks is that my everyday foods are probably too boring to write about. And, given that I'm quite time-poor a lot of the time, trying out a whole new recipe can seem daunting, especially if it's complicated. That, and my waistline has been... shall we say... rampant of late, so I've been trying to cut down on my one true love - baked goods. Don't worry, it won't last forever ;) But it has inspired me to try out (or invent) a bunch of "Quick 'n' Dirty" recipes to keep things healthy and interesting for me on weeknights, and also for you!
 
Last week was my first try at something new. It was my turn to cook, and I had taken lamb fillets out of the freezer but had no clear idea what I was going to do with them. So when I walked in the door after work, starving, I knew that whatever I made had to be quick. I also think it's a sin to over-cook lamb unless it's a tougher cut that is supposed to be stewed, so frying it was the only option. I raided the fridge and the spice cabinet, and this is what I came up with.
 
INGREDIENTS (serves two):
400g lamb fillets (basically lean lamb steaks. 400g was four small ones)
1/2tbsp olive oil (+1/2tbsp more - see below)
2 cloves garlic, finely chopped
1/2tbsp squeezy coriander (I'm sure fresh would be nicer though - it usually is!)
1tsp chilli powder (depending on how hot you like it)
1 huge tomato or two smaller ones
1/3 large cucumber
40g feta cheese
1/4 red onion
6 pitted kalamata (black) olives
1/2tbsp olive oil
1/2tbsp apple cider vinegar (or other acid - I wanted to use lemon juice but had no lemons)
Mint would make a nice addition but I had none of that, either :(
 
Tip half of oil over steaks. Evenly apply chilli, garlic and coriander to it and rub in. Make sure both sides are covered.
 
Heat a pan without oil. When hot, put steaks on. Remember that lamb is best cooked medium and a little pink in the middle, so don't overcook it! It took about 2 or so minutes on the first side, then I flipped them, let them cook for another minute and then turned off the flame and let the residual heat do the rest. The timing will depend on what your pan is made of and how much heat your stovetop retains. Don't leave it in the pan too long, though, because the lamb will continue to cook even after you remove it from the pan.
 
Meanwhile - and this should take you less time than the lamb takes to cook if the ingredients are already out - slice cucumber lengthways, then lengthways again (longitudinal quarters), then chop into 2cm pieces. Cut tomato in half (top to bottom), remove the yucky bit at the top, then cut each piece in half longitudinally, and then 3 or 4 times as if you were cutting wedges, but now each wedge will already be cut in half. Or, you know, cut it in wedges then cut each wedge in half! Cube feta. Slice olives. Combine all ingredients besides feta in a bowl, put remaining olive oil and vinegar on it and toss to combine.
 
Place salad on two plates, and crumble feta over the top. Next, slice lamb fillets into 1.5cm pieces and arrange on top.
 
I imagine it would be nice with a dollop of minted yoghurt on top, but I'd had enough dairy for one day. Oh, and I had no mint!
 
So, reader, what is your go-to Quick 'n' Dirty recipe?


Monday, 4 February 2013

Michelle Bridges' Salmon with Char-Grilled Asparagus and Tomato Salad

I thought I'd share a savoury recipe for once. Normally it's all about cupcakes here, but since I have had increasing difficulty buttoning my pants I thought it might be wise to limit my cupcake intake for a time. Don't panic, it's not forever, just until I can fit back into a pair of pants (in the Australian sense, not the British sense!) other than the only two things left in my wardrobe that fit me!
 
So a while ago (hah probably nearly a year ago. Well done, Past Vanessa, for using your new cookbook so much) I bought myself a copy of the Michelle Bridges Crunch Time Cookbook. For the Americans out there, Michelle Bridges is Australia's answer to Jillian Michaels, although probably not quite as hardcore and mean.
 
But she still says some vastly unpopular things that make some women very angry, and there seems to be quite a polarised opinion on her methods, but she's right about a lot of things, and she definitely doesn't sugar coat it (because sugar is the devil. Duh.) - we're not going to lose weight by cuddling puppies or making daisy chains or through positive affirmations about ourselves, and we're certainly not going to do it by eating cheese (mmm, cheese... *undoes jeans button*). But as anyone who read her book knows, she actually does give a damn about the psychology behind weight gain, and does try to address it. So she's mean AND sensible ;) I don't agree with her brand of rapid weight loss because to me it's unsustainable, but it obviously works well for some people.
 
Anyway, to her recipes - last year I wrote a less-than-complimentary review about her Lentil Shepherd's Pie, probably because it was kind of watery, unfilling and a little bit low on taste. That could easily be fixed with some spices, and, as I said, you could probably add a little sweet potato to it in order to thicken it up and bulk it out. Last night's recipe was a bit higher on flavour thanks to the addition of basil and balsamic vinegar, although I suspect it may not have filled me up had I not added the zucchini and snow peas. That's not saying much, though, given what a bottomless pit I have been lately!
 
I'm sorry there are no photos - I was too hungry! - but I think we all know what a piece of grilled salmon sitting on top of a salad looks like.
 
The link to the original recipe is here, but I had to wing it a little because the supermarket was out of asparagus, and we were out of spray oil at home. And also because I feel superior in knowing that you get more flavour out of tearing herbs than chopping them!
 
The original calorie content is 269cal per serve (recipe serves two), but I'm guessing my version was probably closer to 300-325cal thanks to the oil and the fact I used beans (and a larger number of them) plus snow peas and zucchini rather than just a few spears of asparagus.
 
INGREDIENTS:
 
Two handfuls mixed salad greens, washed and drained
Handful of green beans, topped, tailed, halved across, washed
Smaller handful of snow peas, topped, tailed, halved across, washed
1 small zucchini, washed, topped, tailed, sliced down the middle then in diagonal, 1.5-2cm chunks
1 250g punnet of cherry tomatoes, washed
Handful of basil leaves, torn
2tsp balsamic vinegar
2tsp olive oil
2 150g salmon steaks
 
Put salad greens and torn basil in two large bowls.
 
Heat half the oil in a grill pan (I used our old family cast iron frypan instead. It's an amaaaazing piece of kitchenware to have, it's not even the schmancy enamelled type, and it probably cost about $20 from a camping shop). Put the beans in and cook for a couple of minutes, stirring occasionally so that they get a little bit of charring but don't burn.
 
Next, add snow peas and cook for about 30 seconds to a minute before adding the zucchini and tomatoes. Stir occasionally for another minute or two until everything is a little bit brown and heated through. I recommend tasting the zucchini at this point as uncooked zucchini is quite bitter.
 
Remove from heat and divide evenly between two bowls. Drizzle evenly with balsamic vinegar.
 
Return pan to heat with remaining oil. When pan is hot, grill salmon on both sides until lightly browned but still pink in the middle. Serve atop salad. Enjoy! (and I can say it wholeheartedly this time!)
 

Thursday, 6 September 2012

Practicing Eating Nachos

Ten days and I'll be in Mexico! WHOOHOO!!! So when I was questioned about the wisdom of eating the tasty morsel known as a Nachos Parma (on account of recent difficulties fitting into my jeans), I thought unusually quickly and said "well I have to practice eating nachos for my trip!"

(Did anyone out there buy that?? Any takers??)

If you want to make it at home you'll need a chicken schnitty (non-Aussie translation: schnitzel), some nap sauce (that's Napoli sauce, which I think Americans call Marinara, which never made sense to me because that's what we call a tomato-based seafood sauce), some corn chips and some cheese. Plus sour cream and guacamole to go on top.

Cook the schnitty, top with heated nap sauce, CCs and cheese, grill/microwave to melt cheese, and serve with sour cream and guacamole. And salad, of course!

If I was making it myself I'd probs use some medium-hot salsa with red kidney beans mixed through in place of the nap sauce, and go a bit lighter on the sour cream and guacamole.

But as is, it's already practically fat free, right?? RIGHT???!!

Tuesday, 14 August 2012

The Daring Kitchen: Cornmeal (Polenta with Blue Cheese, Sweet Potatoand Basil)

I can't believe another month has rolled around, and I'm also quite glad that Rachael from Pizzarossa chose a challenge that had a bit of flexibility about it and got me excited. Part of the excitement was because Joy the Baker advised me that grits and polenta were basically different grades of the same product, and so recipes for a product that is largely unavailable in Australia suddenly opened up to me! Sure, the texture of polenta is smoother, but they're roughly interchangable and so a whole world of cooking has opened up for me. YAAAAAAYYYY!!! *does happy dance*

Rachael of pizzarossa was our August 2012 Daring Cook hostess and she challenged us to broaden our knowledge of cornmeal! Rachael provided us with some amazing recipes and encouraged us to hunt down other cornmeal recipes that we’d never tried before – opening our eyes to literally 100s of cuisines and 1000s of new-to-us recipes!

I can't remember where I read about it, but I wanted to cook something like grits with blue cheese. I have never been a big fan of blue cheese, although since living in Adelaide and doing a few of those cheese-and-wine trails I have been exposed to fairly tolerable variations on the theme, like a nice, mild Roqueforte (I don't know if I spelled that correctly) rather than that manky, powdery blue stuff. Ugh.

So when my friend Mary introduced me to the most excellent combination of gnocchi with roasted pumpkin and basil leaves wilted in browning butter, with chunks of blue cheese stirred about until all nice and melty and creamy, well, I was pretty darned happy. And relieved. Because blue cheese isn't so bad after all. I can't ever see myself gobbling down that stinky stuff like my mum does, but that bite is quite passable in cooking.

Fast forward a couple of months, and I'm making the polenta equivalent of Mary's dish within a day of reading about the challenge, using what we already had in the fridge. I was just so excited!!!

I should have written down what I put in, shouldn't I... oh well, I'll give it a go!

1 small sweet potato, in 1/2-1" cubes
1tbsp dijon mustard
2tbsp olive oil
Salt and pepper
1/2c polenta
1c cold water
1c hot water + extra
1 rounded tsp chicken stock powder
1/2c milk
20g butter + extra
40g blue cheese + extra
Squeezy basil stuff (or I'm sure torn fresh basil would be nice, too)

Mix mustard and olive oil together until homogenous. Toss sweet potato in it and roast at 190oC for about 25 minutes then flip the sweet potato around and turn it up to about 210oC until a little browner and soft enough to eat (about another 10 minutes but your oven may differ). Ideally I would have used pumpkin as it's sweeter, but this had to do. I wanted to make this dish NOW!!!

Put polenta in medium-ish saucepan (maybe on the large side of medium. I don't know what the official ruling on saucepan size is!) and add 1c water. Stir around then turn on the heat. Boil the kettle, measure out another cup of water and add the stock powder. Stir around and bring to boil. You'll have to really watch it when it comes to the boil because it pops like lava bubbles!

I think at this stage I added the milk and was taste testing it fairly often so I could tell when it was cooked (it will become smoother). It took less than ten minutes from the boil, probably less than eight but I wasn't timing it as I placed priority on not being splattered by hot polenta.

Once it reached the cooked stage I turned off the heat, stirred through some squeeze basil and some butter and cheese. I kept adding those two until I got the desired consistency and flavour.

Mine turned out quite soft and quite wet, but that's how I like it. If you don't want it as wet then maybe reduce the amount of water you add. You could eat it alone or as a side dish - I served it with some left over casserole, which was nice.

Thank you Rachael for a great challenge!

Monday, 6 August 2012

Pad Thai-Inspired Chicken Stir Fry

Hey there Kiddies,

after my last long, rambly post, and seeing as how most of my readers are foody-type people, I have decided to give you a quick recipe to tide you all over until I bake something again!

Last weekend was one of those weekends that are full to the brim, where you rush about all day and then get to about four o'clock and realise you haven't done any shopping, nor have you gotten anything out of the freezer to defrost.

Great.

(Note: chicken fillets defrost far more quickly if you slice them thinly and spread the pieces out a bit. To stop them going all gross and dry and manky, put them in a plastic bag or container with the lid on)

After a bit of a ferret through the kitchen, I came up with a workable solution. It's not a fancy recipe but it does well with few ingredients in the house. I like to fool myself into thinking that it's a little better for you than Pad Thai, but it's probably not, although there is definitely less oil and I used lo-cal noodles. Note - I would not normally have had the lime in the house, but for the fact that I zested a few limes to put in white chocolate, coconut and lime ganache to fill my birthday cake. Yummo.

INGREDIENTS:
Chicken thigh fillets, fat removed, sliced thinly
Crushed garlic
Chilli sauce
Oil
Onion (I used red because it's what was in the house)
Broccoli, cut into small florets
Kale, sliced (an afterthought to add some more greenery, and, again, was in the house/garden)
More garlic!
Chang's super lo-cal noodles, rinsed and drained (although any cooked noodles would do, preferably rice)
Chopped cashews
More chilli sauce!
Brown sugar (approx. 2 heaped tsp)
Fish sauce (approx. 1 tbsp)
Soy sauce (approx. 1tsp)
Lime juice (approx. 2 limes' worth)
Cashews to garnish

I'm sorry but you're going to have to figure out the quantities yourself. It will depend on how many people you're feeding and what your taste buds are like. The dressing/marinade can be adjusted to suit your taste and the quantity you are making up, as can the chilli sauce. You could also add fresh chilli to give it some real zing, and some corriander/cilantro (which I just remembered I had a squeezy tube of and should have used but didn't. AND I have squeezy lemongrass! DAMNIT!!!). This dressing/marinade is also fantastic on a Thai beef salad, but that's another post for another (summer) day!

METHOD:

Heat about 1tbsp oil in a large frypan. Stir-fry chicken with a teaspoonful of crushed garlic and some chilli sauce (you'll need to taste test). When the chicken is cooked through remove from the heat and set aside.

There should be enough oil and juices left in the pan now to fry up your onion (until softened), broccoli (until bright green and heated through/cooked to your liking) and kale (until wilted - obviously add it much later than the other things). Add the chopped cashews and stir, then the drained noodles and mix until evenly distributed (tongs will help). If it starts to stick, add a little water. Add more chilli sauce to taste.

Add the chicken back in along with the dressing/marinade and mix it all through until everything is hot. Serve garnished with whole cashews.

Quick, easy and quite healthy. If you want to cut down on the calories, add more kale and broccoli and less cashews. Those puppies are quite deceptively high in energy!

Saturday, 14 July 2012

The Daring Kitchen: Cooking "En Papillote"

I've been a little bit slack with the whole blogging/cooking thing of late. Part of it is that I've been quite busy, and other parts are because it just hasn't seemed all that important to me. I think Joelene over at DeterminedUncensored said it well - living more and chronicling less. I do enjoy blogging, but I sometimes find that I won't be present in the moment because I'm thinking about clever little phrases to use, and forming a blog post in my head as I do something. Does anyone else do that??

Anyway, I thought I'd post about this month's Daring Cooks challenge before I forgot and the deadline passed me by again!

Our July 2012 Daring Cooks’ host was Sarah from All Our Fingers in the Pie! Sarah challenges us to learn a new cooking technique called “Cooking En Papillote” which is French and translates to “cooking in parchment”.

So basically what we had to do is cook food in the oven in parchment paper. This is best achieved by adding some sort of moisture (e.g. stock or wine), or to select foods that will release moisture, so that it kind of steams in the paper. I have come across this method of cooking before in various Donna Hay cook books, amongs others, and you may have encountered recipes including the phrase "paper bag " or similar. I don't know why I never tried it because it really is dead simple, and healthy to boot. You know, provided your moisture doesn't come from butter... *whistles nonchalantly*

Sarah gave us a few ideas to get us started, but I decided to try something she hadn't even suggeted and cook pork.

First, I bought some pork medallions - they're basically pork fillets about the length of your palm but skinner, with no bone or fat on them.

Actually, first I preheated the oven to about 190oC. There I go again, running before I can walk!

Next, I washed and halved some raw beetroot. I also washed and chopped up parsnip into inch-thick lengths. These went on a baking tray on baking paper and were sprinkled lightly with olive oil, salt and pepper. They went in the oven and spent about twenty minutes there before anything else went in.

Okay, back to the pork. I placed the fillets flat on a cutting board, and inserted a knife and sliced them along one side to form a pocket that went almost all the way through to the other side but not quite - it needs to hold together on three "sides" when you stuff it.

I then got a Granny Smith apple (I believe they're known as cooking apples elsewhere in the world - a bright green, crisp, tart apple that I LOVE to eat as an apple, but other people can't stand), peeled it, and diced about two thirds of it up into fine cubes (I cut straight down beside the core three times so there was an oblong piece remaining, one side of which was apple and the other side of which was core... buuut that may have just confused you more!). I added about an inch of fresh ginger, finely sliced into tiny matchsticks; a little under a teaspoon of crushed garlic; about half a teaspoon of soy sauce; and a heaped teaspoon of honey, then mixed it around.

I stuffed this mixture into the pockets I made in pork medallions and secured it with a toothpick, tucking the toothpick carefully into the meat because for some reason I was paranoid it would burn, even though I was basically steaming it. Then I placed each medallion into a square of baking paper the longest side being on the diagonal of the paper; squeezed a fat slice of lemon on it (8mm thick or so, half a longitudinal lemon wide - this was my moisture, plus the water in the apple which I knew would ooze out as it cooked) and then placed the slice on top, along with a piece of star anise; and secured the paper by tightly rolling down the opposite diagonals on the short side of the pork (i.e. so that you're rolling the longest pieces of paper), then twist the end pieces tightly to finish the package off.

Note that the beetroot has now been in the oven for about twenty minutes. I put these stuffed pork medallions on a tray in the oven and set the timer for fifteen minutes.

Next, I took some baby carrots, fresh green beans and fresh asparagus; topped and tailed and halved the beans, took the leaves and tails off the carrots, and snapped the woody base off the asparagus and then cut them in half. I used five baby carrots and three asparagus spears per person plus enough beans to complete a serving. I washed them all and didn't dry them because I hadn't thought the moisture through and figured it wouldn't hurt.

Same deal with the paper - place the vegies on a square of baking paper, add some moisture (in my case, about half a tablespoon of chicken stock and a wee pat of butter), do the foldy-twisty thing with the paper and bung them in the oven. I think I set the timer for about twenty minutes (which had just gone off from the pork's first fifteen).

So, if you're confused (and, frankly, I can't blame you if you are), it went a little something like this:

Beetroot & parsnip + olive oil, salt, pepper: 55 minutes

Pork + apple, soy sauce, honey, garlic, ginger, lemon juice, star anise: 35 minutes

Carrots, asparagus & beans + chicken stock, butter: 20 minutes.

The beetroot and parsnip were good. I'd probably turn the parsnip half way because it started to go a bit brown on the bottom side. It was also a little soft but in a good way.

The pork was probably a little over-done, but with pork, better to over-cook than under-cook!

The carrots and beans were a little on the crunchy side but the asparagus was perfect. But they were definitely edible.

All things considered, I will definitely cook "en papillote" again!


Sunday, 20 May 2012

Fancy-Pants Pizza, Two Ways - Caprese Pizza; and Pumpkin, Spinach, Feta and Caramelised Onion

Yesterday I attended my second cake decorating course - more on that later. Last night I finished a jigsaw puzzle, thus crossing another item off my 101 Things list. Right now I'm ridiculously excited about the season premiere of Downton Abbey, which seems like a nice finish to a day that included a cheese making course (will post on that once I've sampled said cheese), also for my 101 Things list, and a day that involved fancy-pants pizza for dinner.

I consider any pizza that doesn't use standard grated mozzarella or tasty cheese and has at least one slightly unusual ingredient to be fancy-pants. Said pizza is often found on a thin crust to allow the flavours to shine, which I certainly achieved in this case on account of using mountain bread (and gluten free wraps for mum) as a base.

Pizza #1 - Caprese Pizza

1 large mountain/pita bread (gluten free wraps can also be used - I used the Freedom Foods ones from Safeway)
1-2tbsp of basil in a tube (I used Garden Gourmet)
1 medium vine-ripened tomato, sliced into 5 slices (not including the icky ends)
2 bocconcini balls (buffalo mozzarella), sliced into a total of 9 pieces (or, 10 and then eat one)
Balsamic vinegar
Fresh basil leaves to garnish, if desired

Have we all encountered Caprese salad?
Caprese salad
From Taste.com.au
I'm actually sort of devastated to realise that I didn't invent the pizza version myself because, until I Googled this image just now and came up with a million pizza recipes, I sort of thought I had. Damnit!

They're dead easy to make, though.

Preheat oven to 220oC. Line baking tray with foil.
Smear the basil paste on the mountain bread.
Arrange the tomato and bocconcini alternately on pizza, with one slice of tomato in the middle, and each slice topped with bocconcini.
Drizzle very lightly with balsamic vinegar.
Bake 10-15 minutes, until cheese melted and bread crisps.
Note that using single-thickness GF wraps will mean it is problematic to remove the pizza from the tray, as the balsamic soaks through.

Pizza #2 - Pumpkin, Spinach, Feta and Caramelised Onion Pizza

1 large mountain/pita bread (gluten free wraps can also be used - I used the Freedom Foods ones from Safeway)
1 small brown onion
1tbsp brown sugar
Water
Approx. 200g pumpkin, cubed, steamed (i.e. enough to cover the pizza with a few gaps)
90g feta cheese (I used the Lemnos organic one)
2-3 handfuls baby spinach leaves

I first encountered this flavour sensation up in my beloved High Country, when I was staying at Falls Creek for some field work with awesome alpine ecologists Suz and Sera, who both happened to be vegetarian. Sera whipped this beauty up one night (using plain store-bought pizza bases to make them more filling) and I haven't looked back.
Fry onion until softened but not brown, then add brown sugar and a little water and cook until bubbles and caramelises (you may need to add a little water. Keep stirring so it doesn't turn to glue!). Spread onion mixture on pizza base.
Arrange pumpkin on pizza base. Crumble 1/3 of the feta over it.
Bake approx. 10 minutes until base starts to crisp and cheese is soft.
Remove from oven and spread with baby spinach and crumble remaining feta over it.
Bake a further 5 or so minutes until spinach is wilted.

Monday, 14 May 2012

The Daring Kitchen: Boeuf Bourguignon

Well. I have to say that I am well and truly ticked off. I wrote the entire post, hit publish and then Blogger threw up an error and ate the majority of the post, and now all that is left of my hard work are the words "This month's chal". Grr *shakes fist*

I had a really good post worked up, too, if I do say so myself. And I can't really remember what I wrote, but I know I was on a roll and that it was awesome. Sigh.

Our May 2012 Daring Cooks’ hostess was Fabi of fabsfood. Fabi challenged us to make Boeuf Bourguignon, a classic French stew originating from the Burgundy region of France.

This month's challenge was Boeuf Bourguignon (aka Beef Burgandy), first popularised by Julia Childs. This recipe is the very same one that Julie messed up in the movie Julie and Julia. For anyone not familiar with the movie, blogger Julie decides to cook and blog her way through Julia Child's The Art of French Cooking and makes a colossal mess of her life (and kitchen) along the way. At the time I first saw the movie I was not a blogger and so I didn't understand how what she was doing could possibly be so hard and invade her life so much.

HAHAHAHAHAHAHAHAHAHAHAHAHA. Foolish Nessie!

Obviously I have since discovered what a time-consuming practice blogging can be. I love doing it, but sometimes I freak out a little because I haven't posted in a while, and sometimes I go on a posting spree and spend an afternoon (or more) scheduling posts to cover me for the next few weeks. Sometimes I don't participate in a Daring Cooks challenge because I'm just too busy, or I do what I did last month - go to the effort of making the meal but never getting around to blogging about it.

Also take into account the fact that poor Julie had committed to cooking every single recipe in the book over the period of a year, and that there were more than 365 recipes in there, which meant that she was cooking more than one French meal each day. And don't get me started on the fact that the actress who played her didn't appear to gain any weight over that year!!!

I nearly did what Julie did - dry the entire thing out and burn it - but I caught it in time, added a heap of water and turned the heat down so that it simmered instead of rapidly bubbling away. You, too, should be careful not to be distracted by something shiny or, in Julie's case, fall asleep on the couch!

First up, bacon. The smell of bacon makes my heart sing with gladness.

Until you more or less render it, at which point it stimulates my upchuck reflex.

But frying it afterwards makes me happy again.

And a word of warning - they weren't mucking about when they gave the instruction to carefully dry the bacon after rendering it. There's a piece of bacon in the above picture that is actually mid-air as it leapt out of the pan and spattered oil and fat at me as the water on it boiled. It's a bit hard to see, but it's one near the middle of the pan. Scary stuff!

Peeling this many onions will annoy you - curse the French and their teensy, tiny, delicious onions! *shakes fist*

But the flavour, once boiled in beef stock, is truly divine. As is the flavour of mushrooms sauteed in butter.

And no, not all of this collection of delciousness made it to the casserole. Why do you ask?  :)

This dish was amazing, if time-consuming, and I'm really glad I had the opportunity to make it. It teaches you a few things about method, which I like in a recipe, and allows you to think about what you could do differently next time. In my case, that will involve browning the meat and veg and dumping them in a crock pot with a bottle of plonk! I'd still do the onions and mushrooms the same and add them later, but I didn't feel like I could just walk away from it all like you can with a crock pot, and that made me somewhat less than relaxed.


My mouth is watering just looking at that picture. Some sort of piping hot casserole with mashed potato and green beans is one of my favourite combinations of food EVER. After corned beef with mash, peas and arrots. And maybe after sausages in onion gravy with mash, beans and carrots. What can I say - I like home-style food. But I'm not 100% sure about the sausages being in second place because this one was pretty freakin' spectacular...

Recipe that follows as written by Fabi:

Equipment required:
  • 1 large Dutch oven/Cocotte/Cast iron casserole, or an oven proof dish, possibly lidded, otherwise a double piece of aluminium foil will do the trick.
  • 1 sauce pan
  • 1 cutting board
  • Knives
  • Measuring cups and spoons

BOEUF BOURGUIGNON

Ingredients for 6 people:
Ingredients
1 x 6 oz (200 gm) chunk of streaky bacon
Olive oil
3 pounds (1⅓ kg) stewing beef cut into 2 inches (5 cm) cubes
1 teaspoon (5 ml) (6 gm) salt
½ teaspoon (5 ml) (2 gm) pepper
3 tablespoons (45 ml) (1 oz/30 gm) flour
3 cups (1½ pint/720 ml) of young red wine. Suggestions: Bourgogne, of course, but also Bordeaux, Cabernet Franc, Cabernet Sauvignon, Chianti, Rioja etc., depending on your country and your taste. Being Spanish, my choice this time was a good Rioja. It really has to be a good one but it hasn’t necessarily to be a very expensive one, you know, il ne faut pas exagérer Smile
1 carrot, sliced (I prefer to cut it into chunks, but that's just my taste)
1 onion, sliced in julienne
1 ½ to 2 cups (¾ to 1 pint/355 to 475 ml) of beef stock or beef bouillon
1 tablespoon (15 ml) (½ oz/15 gm) tomato paste or tomato puree
2 cloves mashed garlic
½ teaspoon (2½ ml) (1 gm) thyme leaves
1 bay leave (Julia says it has to be crushed, I prefer not to crush it so that I can remove it at the end of the process)
The blanched bacon rind
18-24 small onions, brown-braised in stock
1 pound (½ kg) mushrooms sautéed in butter (Champignons are perfect for this purpose)
Fresh parsley sprigs to serve

Directions:
1.Prepare the bacon: Remove the rind. Cut the bacon into lardons (Sticks, ¼ inch thick and ½ inch (5 mm x 15 mm) long) and simmer everything in 4 cups (1 litre) of water for 10 minutes. Drain and dry carefully with paper towels.
2.Dry the meat cubes carefully with paper towels.
3.Preheat oven to hot 450ºF/230ºC/gas mark 8
4.In a fireproof casserole or a frying pan, sauté the lardons in a tablespoon of olive oil for 2-3 minutes until they’re lightly brown. Remove them to a side dish with a slotted spoon.
5.In the same casserole/pan, sauté the beef until it’s golden brown. Remove it to the side dish where you keep the bacon and set aside.
6.Still in the same casserole/pan, sauté the carrot and the onion.
7.Return the bacon and the beef to the casserole. Sprinkle it with salt and pepper, then add the flour and toss.
8.Place the casserole/dish uncovered in the middle position of the oven for 4 minutes. This gives the meat a lovely crust.
9.Remove the casserole/dish from the oven. Stir in the wine, stock, tomato paste, mashed garlic cloves, thyme, bay and the blanched bacon rind.
10.Bring it to simmering point on the stove. Now, if you were using a frying pan, discard it and put the stew in an oven proof dish.
11.Cover the casserole/dish (If your dish doesn't have a lid, use aluminum foil and stretch it to the edges of the dish in order to minimize the loss of juices) and place it low in the oven. Adjust the heat so that the liquid simmers very slowly, it has to go on for 3-4 hours.
12.While the stew is cooking, prepare onions and mushrooms. For the onions: Melt 1 tablespoon butter in a frying pan and sauté the peeled onions until golden brown. Add beef stock until they’re almost covered and simmer for 20-25 minutes, or until almost all the liquid disappears and they’re tender but keep their shape. Set aside.
13.Prepare the mushrooms as well: Wash quarter and sauté them in 2 tablespoons butter. Keep on stirring until they’re nicely brown. Set aside.
14.When meat is tender, put the stew into a sieve over a saucepan, wash out the casserole and return the stew to it. Put onions and mushrooms over the meat.
15.Skim the fat off the sauce. Put the saucepan on the stove and simmer it for 2-3 minutes. Skim additional fat if it rises. The sauce should be thick enough to coat a spoon. If not, boil it until it thickens. If it’s too thick, stir in some stock or bouillon to make it lighter.
16.Pour the sauce over the stew. Put the casserole on the stove or in the oven and reheat for 2-3 minutes. Serve it in the casserole with some sprigs of fresh parsley. Some goods sides are potatoes, noodles or rice.

Freezing/Storage Instructions/Tips: You can keep leftovers in the fridge for 2-3 days. If you want to freeze it, it lasts up to 3 months.

Notes:
•This recipe gives its best when prepared in a Dutch oven (Aka cocotte, cast iron casserole, or simply casserole). It’s not mandatory to have one, I know it’s an expensive thing but if you really love to cook, it is an excellent investment. Otherwise, an oven proof dish with a lid, or sealed with aluminum foil, will do the trick.
•I confess sometimes I skip the skimming process. If you don’t use too much oil or butter and you remove all the fat from the meat, it is not mandatory at all (this is just my opinion)
•Some people add, 10 minutes before serving, a couple of spoonfuls of beurre manié (A paste made of 50% flour and 50% butter) in order to thicken the sauce and make it look more brilliant. I don’t add it cause I like the sauce just the way it is, but if you heard about it and want to try, please feel free to do it.
•I know some people hate mushrooms. If this is your case, just don’t add them. And have no sense of guilt at all.

Monday, 7 May 2012

Michelle Bridges' Lentil Shepherd's Pie

Well, as I promised on the 16th of March, I have tried out one of Michelle Bridges' recipes. I've been feeling a bit out of control with my eating, and so I figured that if I put a bit more structure into feeding myself (i.e. preparing meals for the week ahead) I would be off to a good start.

I must admit I was a little bit concerned that it would taste like @rse, as a lot of "diet" recipes are wont to do. This reminded me a lot of this Weight Watchers recipe for a lentil-vegie curry, only without the sweet potato and therefore without being quite as satisfying. It had one foot in the "watery/flavourless" camp and the other in the "the cheese makes it tolerable enough to eat it four nights running". I imagine it could be made quite spectacular by adding herbs and spices, but I dutifully obeyed The Terrifyingly Fit Ms Bridges and didn't eat whilst I was cooking. Which means that I didn't taste whist I was cooking. Which meant that I had no idea what it tasted like until last night when I reheated portion number one! Ah well, live and learn.

Also, it filled me up temporarily, but it went down quickly, as diet foods tend to do. Luckily I had enough space in my day for another piece of fruit and a little tub of frozen yoghurt, so that stopped me from dying from hunger during my waking hours.

I made it sound bad, didn't I.

It's not that bad, I swear! Seriously, I will make it again, with either curry powder and salt (the tinned tomatoes I used were unsalted), or a mixture of herbs. My perception of it is also no doubt quite skewed because I have been eating badly for quite a while, and this is a sudden change from the delicious diet-damaging pub meal of my choice - 300g steak, cooked medium-rare, served with pepper sauce, chips and salad *drools* Not that I have it more than once a week, but gosh I love it...

Lentil Shepherd's Pie with Steamed Broccoli, from Michelle Bridges' Crunch Time Cookbook
Serves 4; Prep 20mins; Cook 1hr 10mins; 290cal per serve

1/2c dried brown onions
1 whole + 1 chopped onion
1 bay leaf
500g cauliflower, broken into florets
1/3c low-cal ricotta
Olive oil spray
I large carrot, diced
150g mushrooms, halved depending on size
1 garlic clove, crushed
400g can diced tomatoes
Freshly ground black pepper
1/3c grated parmesan
400g steamed broccoli to serve

Place lentils, whole oinion and bay leaf in a saucepan. Cover with 2c water and bring to the boil. Gently boil for 40mins (you may need to stir/slightly top up water a couple of times to stop it from catching) until lentils are tender. Drain and discard onion and bay leaf.

Meanwhile, steam cauliflower until very soft. Transfer to a bowl and mash with ricotta to make a coarse puree.

Lightly spray frying pan with olive oil. Cook chopped onion, carrot, mushroom and garlic for 8mins, stirring until softened and lightly browned. Stir through tomatoes, drained lentils and 1/4c water. Season then spoon into 32x20cm ovenproof dish (which I also gave a quick spray of oil). Top with cauliflower mash and parmesan.

Bake 30mins until cheese is golden. Serve with steamed broccoli.

Enjoy!

No, really... enjoy!

(and if you don't enjoy it all that much, at least the virtuous feeling should keep you going for a bit)

Tuesday, 14 February 2012

The Daring Kitchen: Flipping Fried Patties! (Zucchini, Carrot, Chick Pea and Sweet Potato Fritters)

I was ever so pleased when I discovered that this month's Daring Cooks challenge was to make fritters. The last few have been quite, well, challenging. I know that's the whole point - to extend yourself and add to your culinary skills - but once in a while it's nice to have something quick and simple that you can do some serious improv on with what is on hand rather than having to dedicate four hours of your already-busy weekend to locating ingredients and preparing and cooking something quite complex.

Don't get me wrong - I do like to learn new things and make impressive dishes, but this month's challenge is more my style of cooking, and I generally leave the fancy stuff to the realms of baked goods. Like the time I made Sweetapolita's Ruffle Cake. I think I also enjoyed the fact that I didn't feel like I needed to read every single word on the information sheet in order to successfully complete the recipe, or freak the heck out about doing somethign wrong. Which I think means I will always be placed squarely in the "cook" corner, and not the "chef" one!

The Daring Cooks’ February 2012 challenge was hosted by Audax & Lis and they chose to present Patties for their ease of construction, ingredients and deliciousness! We were given several recipes, and learned the different types of binders and cooking methods to produce our own tasty patties!

I'm on a bit of a health kick at present so I wanted to make something full of vegies but also not light on flavour. Audax and Lisa provided a list of common binders for patties, and I decided to go with sweet potato as well as some blended-up chick peas.

I spent a week or so thinking about what to put in these. Not non-stop, obviously (although, given how often I think about food it wouldn't be entirely surprising if that had been the case!), but there was a certain flavour I was going for - there's this Indian stall at the St Andrews Market (a hippie craft/farmer's/trash n treasure market near where I live in Melbourne) that makes these wraps that have this sort of roasted vegetable fritter type thing, wrapped up in Roti and served with chutney and salad. I thought I'd give the Roti a miss (only cos I was cooking for myself and mum, and mum wouldn't be able to eat them because of the gluten, which would leave me to eat an entire packet of Roti... which, let's face it, would be delicious, but not really in line with my current health kick!).

The ingredients are probably fairly flexible - as I'm sure all the other Daring COoks discovered, making patties/fritters is definitely one of those add stuff "until it looks right" propositions!

1 small-medium sweet potato, peeled and steamed/boiled until soft
1 can (400g-ish) chick peas, drained
2 medium zucchinis, grated, liquid squeezed out to within an inch of its life
1 medium carrot, grated, liquid squeezed out
1/2 medium brown onion, grated, liquid squeezed out (that'll test ya! Or, see below note on blending)
2 cloves garlic, you guessed it, grated!
1 egg
Sweet paprika (I added about a tablespoon but add to taste)
Moroccan seasoning (I never do spell that correctly... I used about a teaspooon, but again, to taste)

Blend steamed sweet potato, chickpeas and egg (and if you were too scared to grate the onion and okay with your patties being sloppy, blend that too) in a food processor until it forms a smooth paste.

Add it to the grated vegetables and smoosh about with your hand until combined and the different vegetables are evenly distributed. Add spices and continue to smoosh mixture until well mixed.

Divide into six to eight balls.

Heat olive oil in frypan (I used a cast iron one) and place half the patties in the pan. Squash them so they are about 2cm thick. Fry until browned then flip. Continue cooking until the second side is cooked. Repeat with the other half of the raw patties.

Serve with a garden salad and mango chutney such as my BFF Kirsti made me for Christmas.

Tastes good cold, too! Which is just as well, because now that I can't drive for six months (no, I didn't lose my licence! It's a medical exclusion) and therefore have to catch the bus to Barham on Sunday nights, I have to eat dinner on the bus (without the driver noticing - no food allowed on the bus!). The good thing about catching the bus is that I have plenty of time to blog on my way up. Which makes me feel a little queasy after a while, but I'm beginning to think that's more to do with needing glasses... and now I'm rambling... so, ENJOY!

Monday, 14 November 2011

The Daring Kitchen: Cooking with Tea

Well. This post is going to be totally crap because I not only did a really half-arsed job of the recipe (i.e. I read it two weeks prior to cooking it and then sort of... guessed what was in it!) but I also cooked it in one helluva rush (after the brownies - yet to post on that - but before the cupcakes) on my way out the door to the movies to see The Cup (great movie, btw), but then the only photo I was able to take of it was with my phone, under terrible lighting conditions (fluorescent lights plus the light of an LED headtorch because I realised that there wasn't enough light for my phone to cope!). I was hungry and determined not to miss another Daring Kitchen challenge so I sort of threw it all together. And then I ate it. And then I powerwalked to the movies (cos I'm not allowed to run alone, but frankly, a seriously determined powerwalk coupled with the stress of running in late was probably worse for the ol' ticker than actually jogging would have been. I think my boobs prefer me to powerwalk, though... just sayin'!), and then I had to sit in the cinema, dripping with sweat with a stitch from eating my soup too fast and then powerwalking. Luckily I remembered to bring a jumper, otherwise I would have frozen to death as my sweat evaporated.

I know, you all loved that visual. You're welcome :)

Also, three cheers for sentence structure!

Aaaaaaaaanyway, Sarah from Simply Cooked was our November Daring Cooks’ hostess and she challenged us to create something truly unique in both taste and technique! We learned how to cook using tea with recipes from Tea Cookbook by Tonia George and The New Tea Book by Sara Perry

So... I guess, first up I'll tell you what I did, and then I'll tell you what I was supposed to do!

WHAT I USED:
2 green teabags
A kettle full of boiling water (filtered - I cooked it in Adelaide and didn't think the natural tap water would do much to improve the taste of the soup!)
A 2cm chunk of ginger from my freezer that had been thawed, and was oozing liquid all over the place and not very aesthetically pleasing and kind of rubbery in texture, but the flavour of which was okay *draws breath*, kind of peeled (= the skin hacked off) and chopped into tiny little pieces
Beef, finely sliced (I wanted to use a decent steak but couldn't find it in a small enough quantity, so ended up finely slicing gravy beef, which is why it turned out tough, but I'm totally okay with that!)
Bunch of bok choy, bottom cut off, sliced in half, rinsed
Small packet of rice vermicelli
Chinese five spice

So I boiled the kettle, soaked the tea in the hot water in a saucepan until I had a saucepan of green tea, removed the teabags, put the saucepan on the heat, added the ginger and brought it to the boil, then threw in the beef and the bok choy and topped up the water so the bok choy was mostly covered.

I boiled it until the bok choy was done but still a bit crispy, cos that's how I like it. Then I put half the packet of rice vermicelli in a large-ish serving (soup) bowl and added about half the soup. Rice vermicelli, you see, basically cooks on its own in a minute or two when you pour boiling liquid over it. I kept the other half for the following night's dinner, which I then captured in a crappy photo on my phone, which isn't part of this post because my normal laptop is at the doctor's (it gave me the Blue Screen of Death the other day) and I can't make my phone synchronise with either my old laptop or my mum's. Boo. Don't worry, you're not missing out - it's a super-duper-crappy photo.

In hindsight, it needed soy sauce. Or possibly a wee pinch of stock powder And maybe a little chilli. But I must say that I'm a little bit curious and quite impressed at how quick and easy this was, and also quite liked the unaccustomed flavour of the green tea - I will definitely be trying to make variations of this in the future. Thanks for the inspiration, Sarah!

So, anyway...

WHAT YOU WERE SUPPOSED TO COOK:


Servings: 4
Ingredients
4 green tea teabags, or 1½ tablespoons (22½ ml) (3 gm) green tea leaves
1¼ inches (3 cm) fresh ginger, peeled and thinly sliced
5 oz (140 gm) thick or thin egg noodles
10 oz (280 gm) firm tofu, drained and cubed
5 oz (140 gm) bok choy or spring greens, shredded
1-2 tablespoons (15-30 ml) light soy sauce
2 tablespoons (30 ml) (1 oz) (30 gm) red or white miso paste
½ teaspoon (2½ ml) sesame oil
6 scallions (also called spring onion or green onion), trimmed and sliced
a handful of shiso (Japanese basil or perilla) or mustard cress, or other micro greens, to garnish
Directions:
  1. Place 6 cup (1½ litre) water in a pan with the green tea bags or leaves and the ginger slices. Heat until the water is just below boiling and bubbles start to form.
  2. Remove the pan from the heat and let it steep for four minutes.
  3. Remove the tea bags or strain the liquid to remove the tea leaves. Return the ginger slices to the liquid and reserve.
  4. Meanwhile, cook the noodles according to package instructions in a separate pan.
  5. Return the tea liquid to the heat and add the tofu, bok choy
  6. Scoop out some liquid to a small bowl and mix in the miso paste. Then return the liquid to the pan.
  7. Add the sesame oil and scallions. Spoon into bowls and garnish with the shiso, cress, or greens.
Having just read over this recipe, it is far superior to the one I whipped up and and I can imagine how awesome it would taste. Although, to make it boy-friendly you would probably replace the tofu with either thinly-sliced steak or maybe dumplings of some sort. And  you may consider frying the steak first and dumping it in at the last possible minute. Just a thought! I recommend trying the recipe that I was supposed to cook and not the one I actually did. Watch this space for a new and improved version...

Green Tea, Tofu, and Noodle Soup

Sunday, 30 October 2011

Ginger Prawn and Green Mango Salad

This is a recipe that I got inspriation for when I googled "green mango salad", as I had green mangoes and seemed to recall that I enjoyed it in Thailand. True to form I forgot to buy half the ingredients and had to substitute several others that I **thought** were in the cupboard, and further to that had opted to take a little bit from several recipes, so it came out quite a bit different to the original. This serves two people and is quite a light, summery meal.

INGREDIENTS:
1 green mango, finely sliced (note that my mango was green on the outside but fairly soft on the inside. I don't recall that being the texture from Thailand but it had a certain tartness that offset the normal mango sweetness)
1/2 a continental cucumber, or 1 whole lebanese cucumber, julienned
1/4c chopped, roasted peanuts
2tbsp mint leaves, finely sliced

10 green prawns, deveined
1 tbsp olive oil
1 tbsp finely sliced, or grated ginger
2 tbsp fish sauce
1 tbsp brown sugar
1 tbsp water
2 tbsp lime juice
2 tbsp fresh coriander leaves, torn
1 small chilli, seeded and finely sliced
Sesame oil to taste

Combine ingredients as far as the mint leaves in a bowl. Save some of the peanuts and a couple of whole mint sprigs for garnish.

Cook prawns in frying pan with ginger and oil until cooked through (white) and vaguely pale brown, turning once.

Add cooked prawns to salad ingredients.

Combine remaining ingredients in a cup, reserving a couple of sprigs of coriander for a garnish. Add to salad and toss through.


Yummm. It's a winner. I'm not sure whether I prefer it over the Thai Beef Salad I make, but it's good to know I have this up my sleeve for an alternative quick and light summer meal.