Showing posts with label Cupcakes. Show all posts

Monday, 16 July 2012

Scottish Tablet Cup Cakes with Whisky Icing - A Makey-Cakey Birthday Surprise Ingredient Swap

A little while back I agreed to participate in an ingredient swap, initiated by Ruth over at Makey Cakey, to distract her from her impending 30th birthday. Happy birthday, Ruth! (Just quietly, I'm turning 30 on Friday and I'm a little freaked out about it too, and plan on distracting myself by spending a lot of the day baking and decorating an awesome (hopefully!) birthday cake for my party on Saturday night...)

I was paired with Ruth's husband Jono, who posts four-ingredient recipes on Tumblr. Pretty good idea, those four recipe things, because let's face it - you're far more likely to try something new if you don't have to climb a mountain in the French Pyrenees and pluck a feather from the first-born chick of the incredibly rare and exotic Mystery Fabulous Bird to stir your cake batter with. By which I mean, if the ingredient ain't in my cupboard or am not likely to use it again, then chances are I won't cook it!

Being from Scotland, the ingredients that Jono sent me were some 10-year-old Scotch, and some Scottish Tablet. Scotch doesn't need much of a preamble (although perhaps I should apologise to Jono for wasting it on cup cakes), but Scottish Tablet is kind of like... hmm... a dry, crumbly, rich fudge, would probably be the best way of describing it. I Googled it and  basically you can make your own by boiling condensed milk (which contains sugar) with butter and - wait for it - more sugar. It comes as no surprise to me at all that it comes in very small packets! A little bit goes a long, long way.

I decided to bake something "inspired by" the Tablet, rather than just cooking with it. And then I decided that what I made tasted kind of crap, so I decorated it with some crumbled up Tablet and it became 90,475,178,394,156,128.99465^784 (a prize will be awarded to the first person who can actually tell me in writing what that number is!) times more palatable.

This meant that I was going to base my cup cake recipe on the concept of condensed milk, sugar and butter. I wanted it to be golden in colour so I tried to caramelise the condensed milk, which didn't go so well - I mainly kept getting distracted and burning it, but it did thicken... which probably wasn't a good thing for the cup cake texture, in the end. I also added brown sugar because it wasn't brown enough or sweet enough or really tasted like anything at all. Boo.

I also had a moment of insipiration whilst I was "browning" the condensed milk - when you make Anzac Biscuits, you melt your butter with golden syrup and then add half a teaspoon of baking soda with a tablespoon of boiling water to cause a fizzy reaction, then you dump it in with the melted butter/syrup and it goes crazy and grows in size by at least three or four times. So I wanted that to be the raising agent... only it didn't fizz out like it was supposed to. Perhaps the baking soda was past its prime - who knows. But because that didn't really work I added a teaspoon of baking powder to the flour, just in cases. At the very least the baking soda would make the cup cakes brown more. 

After all that, it's not suprising my recipe was kind of crap because I totally winged it, no recipe book in sight, and had to keep adding ingredients to make it "look right"! But hey, I had fun trying. And they're not that bad, but they could use a lot of improvement. For one, I would cook them for less time. But they did rise!

SCOTTISH TABLET CUPCAKES:
1/2c sweetened condensed milk (turns out this equates to half a can of the Carnation stuff)
100g-ish butter
1tsp baking soda
1tbsp boiling water
1tsp whisky
1 1/2c plain flour
1tsp baking powder
1/4c brown sugar, firmly packed
2 eggs, lightly beaten
1/2c milk (or was it 1/4c? Again, very much a case of judging the texture of your batter. How about you start with 1/4c and go from there!)

Stir condensed milk over low heat until it goes a bit golden (this didn't happen quite like I had hoped - most of the golden colour came from when I walked away for half a second and it caught on the bottom!). Remove from heat and add room-temperature chopped butter; stir it in quickly to melt it and stop the condensed milk from seizing.

Meanwhile, boil kettle. Mix 1tsp baking soda with 1tbsp boiling water in a mug or similar, mix quickly and tip into the condensed milk/butter mix (I'm wondering now whether it reacts with the sugar in Anzacs, and because there was only the sugar from the condensed milk present it may not have been enough?? Nah, I'd say the baking soda was past its prime). Stir around quickly, hope it froths and become disappointed when it doesn't.

Before this you should have put your flour in a large mixing bowl! And at this point you would also have dumped a quick teaspoon of baking powder in because you've realised your cup cakes won't rise without it.

Add condensed milk mixture to flour and stir quite vigorously until blended. Add 1/4c brown sugar and mix in. Add one egg at a time, mixing between each addition, then the whisky, and the milk - start with 1/4c then work your way up.

Divide into (10-ish) cup cake liners and bake at 170oC for... shoot. I think it was a total of around 20 minutes, or, at least, it should have been around that! Check it at about the 18 minute mark and if they're still sloppy like mine were, put them in for another five minutes and check again. Watch them carefully - I made the mistake of thinking that a wet skewer meant it was waaaay undercooked when I think it could have done with being a little undercooked rather than overcooked. Live and learn. Plus I think I cooked mine for an extra ten or so minutes after the 18 minute mark so don't be me!

When they spring back I guess they're done... cool on a rack. I covered mine with a tea towel while I cooled them to arrest the drying-out of cooling cupcakes. I think I realised just in time!

Verdict: Dense, a little boring and a little dry. Adjust baking times and consider adding more milk. Or less flour. Or more sugar. Or cooking for less time. Or something. One thing I will say, though, is that they leave quite a pleasant, silky-smooth sensation in your mouth. Like, you know how gluten free stuff leaves a "squeaky" feeling? This is kind of the opposite.

WHISKY ICING:
Cream around 125g butter with 1/4c densely packed brown sugar until well mixed. Gradually add 1c icing sugar with the mixer running. Scrape bowl down. Start mixing again. Add 1tbsp or so of whisky and mix. The icing will be a little on the wet side. I added a total of 1/2c more icing sugar, 1/4c at a time, until it reached the right consistency. It smells and tastes very strongly of whisky so you don't need to pile it up too high on the cupcakes. A dessert spoon-full or so should do; apply it and swirl around with the back of the spoon.

Chop up some Tablet and decorate the tops of the cupcakes with it. The sweetness will balance the harsh whiskey flavour; the cupcakes themselves are a little on the boring side so they barely factor into the overall impact!

I imagine this recipe is one that could be improved quite easily but I wanted to get it posted in time for the challenge. I also went as Scottish as I could with the cup cake wrapper - do you like it?

I posted Jono some ingredients that were kind of Australian (although we're such a hotch-potch of cultures and have had many influxes of the English, Scottish and Irish (as well as other cultures in more recent years) that it's quite difficult to come up with a quintessentially Australian baking ingredient that isn't originally British!). I went with macadamias - because they are endemic to Australia, no matter what the Hawai'ians say!; ginger - because apparently some of the best ginger in the world is Buderim ginger from Queensland (but that's probably a rumour started by the Buderim ginger company!); and some Manuka honey - honey from a tree native to Australia (and NZ), which apparently has magical healing properties. I can't wait to see what he has made!

Update: Jono posted his recipe - chocolate macadamia cupcakes (only four ingredients!!!) - here, and Ruth posted a recipe roundup here.

Friday, 29 June 2012

2012 Ice Cream Cupcake Contest - Lemon Meringue Ice Cream Cupcakes

This is the contest that kindled my interest in perfecting cupcakes a year ago. It is what incited me to declare one of my 101 Things Challenges to be Year of the Cupcake, and bake a new cupcake each month for twelve months (Heheh. And I wonder why I have struggled with my weight this year...). Last year's effort was Thai Ginger Cupcakes, which featured a ginger base (which I seem to recall was pure bliss), and a scoop of vanilla ice cream on top rolled in toasted coconut and lime zest. Yummo spagummo.
Looking back at last year's post, I cringe a little bit. I can probably blame most of the bad photography on the fact I took the photos indoors at night under fluorescent light, but the styling wasn't crash hot, either. Not that it's much better now (please ignore the green curtains in the background - they're the cheap ones mum made in the eighties and has been intending to replace them with cream-coloured roller blinds for quite a time, but, in true Mum style, this hasn't happened yet), but these days I make more of an effort to take photos in daylight. It doesn't always pan out that way, and sometimes I just need to eat it immediately so I point and shoot with a flash on, but I do try a little harder now to compose the photo. Plus I've realised the redundancy of taking photos of every damned step of the recipe, unless you are an awesome photographer (like Ree Drummond) or you have something interesting or quirky or important to say about the step. Ree does her cooking commentary well and is the reason I fell in love with that style of food blogging, but I don't think I'm quite up to her level. You know, quite. <--- UNDERSTATEMENT!!!

The rules for the Ice Cream Cupcake Contest include posting your cupcake recipe (which must include both cake and icecream elements) and photo; linking back to Stef over at TheCupcakeProject and Tina/Bethany/Kevin over at Scoopalicious; add your link to the bottom of Stef's competition page; and fill out the entry form.

So that's the links taken care of, and once this post is complete, that will be the posting taken care of! (also, so I'm not just paying lip service to the rules, I will also link you to Stef's ultimate vanilla cupcakes. I've only ever made a self-styled GF version, but if they are anything to go by, oh, my. You must try them. Now! VANILLA! Nom.)

To preface the post, I will show you what we're aiming for. I actually went a little bit schmancy this year and combined three elements to make my Lemon Meringue Ice Cream Cupcakes, all of which were home-made: Cupcakes, ice cream and meringue. Oh, make that four - lemon curd, which was piped into the cupcake and also swirled through the ice cream.

PART ONE: The ice cream. This should be done a couple of days in advance, I think. I began it the night before and as you will see in later photos, its structural integrity was somewhat questionable.

This one's from Taste.com.au and was the only basic ice cream recipe I could find that a) required only the amount of cream I knew was already in the fridge, and b) didn't call for an ice cream maker (which I don't have. By the way, I have a big birthday coming up. Hint hint. And I like the colour red. Just in case anyone (like the people at Cuisinart, for example, or Kitchenwaredirect, who have received a wee bit of my income over the years) are listening... HAHAHA as if. Mind you, if they are listening, if they give me an ice cream maker I promise to blog my way through their recipe book! Yep, good thing dreams are free... and surely you can forgive me for dreaming, because my brain is a little fried at present on account of being precisely three weeks from the big 3-0. Denial is a beautiful place.).

Anyway.

Because I've linked to the recipe I won't rehash it, but I will tell you that I think I did something wrong. I suspect it was something to do with how hot the liquid was when I added it to the egg yolks, but I'm not sure. I don't know whether it's supposed to look like this (the froth on the top of which looked and tasted like when you leave a tub of ice cream in the car on a hot day and it melts and expands and foams like a rabid dog, so I thought I was on the right track at the time)...
(and don't ask me why it's sideways. It was taken in landscape. This usually only happens with photos that were previously rotated. Sorry!)

But then, when I was eating a spoonful of foam to confirm its deliciousness carefully stirring, the foam parted to reveal an un-homogenous "custard". Yes, it had been coating the back of my spoon as the recipe stipulated, but not thickly as I had expected. Perhaps this is why:
The lower layer is all chunky (albeit fine, soft chunks, like a porridge made of polenta), so I attacked it with the stick mixer and all was well in the world. Yep, world peace and the dissolving of world debt really is as simple as fixing your custard-y errors with a stick mixer. You're welcome.

As I said before, leave plenty of time for the freezing part. It'll take longer than you think.

Once it was (mostly) frozen I took about eight heaped spoonfuls out (one for each cupcake) and stirred through some crushed meringue and about 1/4 of the lemon curd. You want it to be frozen enough to hold its shape (unlike mine!) when it comes time to put it on the cupcakes.

PART TWO: The lemon curd. Yields... I dunno, about 1/2-3/4 cup? Enough to fill some cupcakes with but not much more.

I got this one out of my new cupcake book. Given I have to post this before I get home for the weekend I will have to forgo citing it for now, but promise to edit it in shortly.

2 egg yolks
1/3 castor sugar
Zest and juice of 1 lemon (approx. 1/4c juice)
65g butter, softened and cubed

Beat egg yolks, sugar and lemon juice until combined. Add zest and stir. Place in heatproof bowl over saucepan of simmering water (don't let the bowl touch the water) and add butter. Stir with wooden spoon until butter melts and then keep stirring until it thickens into a custard, about four minutes or so. Push through a seive to get rid of the zest chunks (I may or may not have gathered them together out of the seive and sucked the residual lemon curd off it before discarding it... but nobody saw it so it probably didn't happen). Cover with plastic wrap to stop a skin forming and cool in refrigerator.

PART THREE: The meringue. These are from AWW's Cook, the recipe for Meringue Kisses with Passionfruit Filling, but obviously without the filling. Sounds like they could be tasty, though...

1 egg white
1/2tsp white vinegar
1/3c castor sugar
1tsp icing sugar.

Preheat oven to 130oC. Line tray with baking paper.

Beat the first three ingredients until stiff peaks form. Fold in the icing sugar.

Using a "soft serve" tip (I think it's a Wilton 2D but could be wrong. It's a low number and a letter, I think!)...

...pipe soft-serve-esque meringues to fit on the cupcakes. You will want to have some meringue left over to crush into the ice cream so if you pipe nine swirls and use the ugly one for the ice cream you'll be fine.

Bake until they have dried out. The first clue is that they will move on the tray when gently pushed (wet meringue sticks), and the second clue is that they will feel light and sound hollow when the bottom is tapped. This will take 30-50 minutes. Keep an eye on them because you don't want them going brown - soft serve isn't brown!

Once cooled, use a fruit pitter/stoner like this:

... to gouge holes in the underside of the meringue. This is partly to quarry more meringue to stir through the ice cream and partly to allow the meringue to grip to it and not just immediately slide off. I guess you could probably use a paring knife (wow. Only took me eight goes to spell it correctly!) and a teaspoon, or perhaps a grapefruit knife, but this bladed spoon with a point did a good job of gently scraping at the meringue without stabbing myself, slipping or otherwise crushing the meringue or putting a hole through it. Go gently, grasshopper.

PART THREE: The cupcakes.

This is a basic butter (cup)cake recipe from the AWW Cooking School cookbook. I divided the below recipe into thirds to yield eight cupcakes (so this one yields 24). Mine were a little overcooked so maybe check them before the stipulated 20 minutes is up.

250 butter
1 1/4c castor sugar
3 eggs
2 1/4c SR flour
3/4c milk <-- edit: check this quantity on weekend

Preheat oven to 190oC. Do the usual - whip butter until light and fluffy, add sugar and whip until nice and combined, add eggs (don't over-beat), add flour and milk in 2 batches each, just combining (again, don't over-mix). Divide into 24 cupcake cases. Bake for a little under 20 minutes, until they spring back when touched. Remove from oven, cool 5 minutes in tin then turn onto rack.

ASSEMBLY:

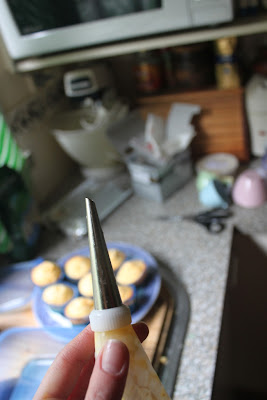
Once the cupcakes have cooled, the curd has set, the meringues are sorted and the ice cream is frozen, get your bismarck tip (yay! I know things! I imagine you could also do it with a round tip, or get that paring knife out again and cut little rounds out the top of the cake, squirt some curd into it with whatever tip you have, then replace the little round of cake) and stab each cupcake with it, wiggle it about a bit to make a cavity and then pipe the curd into the cupcake.

I got a couple of squirts into each cupcake, and then dusted them with icing sugar in case someone didn't want to eat the cupcake fully assembled (scandalous I know, but it was a possibility. I also had to test the cupcakes to make sure they were up to snuff, so I can confirm that they taste good like this, even if they look a bit scrappy).

Finally, get a spoonful of your (hopefully frozen!) ice cream, smear it carefully on the underside of the meringue and assemble the cupcake. It was a pleasing combination of sweet and tangy, and the competing textures made it a pure joy to eat. A messy joy. Note the melty ice cream sliding off my cupcakes - don't be me. I suspect that if the ice cream had been much harder, though, the meringue may have shattered when I applied the ice cream to it. It's a fine line!

If I had my time again, I would make the ice cream a week in advance. Or I would just use store-bought vanilla ice cream and soften it on the bench before stirring through the crushed meringue and lemon curd. But altogether I'm pleased enough with them - how they tasted and how they looked - to post a second photo!

Must... eat... quickly!

PS - if you want to be a Cheaty McCheaterson, I can't see a reason that you couldn't just use packet mix cake and store-bought lemon curd and ice cream. I don't know whether you'll get the same quality product (unlikely) but if you're in a hurry, better to have Cheaty Cupcakes than no cupcakes at all!

Wednesday, 30 May 2012

Year of the Cupcake #12 - Coca-Cola Cupcakes with Peanut Butter Frosting

Hello All.

It's been an interesting year. If you'd been paying attention, you would have realised that it was -

YEAR OF THE CUPCAKE!!!

The year was interesting in a lot of other ways, but I mean "interesting" in the sense of "science experiment gone horribly wrong". I'm not even going to start on that, but cupcakes have helped get me through, and so has posting here regularly. It's time spent focusing on something productive, instead of sitting back and let everything wash over me.

Don't ask me how I ended up with 12 cupcakes in 11 months. Actually, I DO know - I made two batches in the month of April, because I had an unexpected detour into Daring Cooks challenge territory. And that's not counting the ones I made and didn't blog about (but may yet do so on a slow week). So here I am, finished a month early! For those who know me, you would realise that this is a little uncharacteristic, and I imagine that nobody is suprised that it happened entirely by accident ;)

Here's a wee round-up of the year's cupcakes (and you can also find it here):

July 2011 - Carrot Cupcakes with Cream Cheese Frosting (GF). These were my first foray into gluten free cupcakery, and I was suitably impressed by how they turned out. That is to say, I wasn't disheartened as I imagine I may have been if the pumpkin cupcakes (see below) had been my first attempt.

August 2011 - Rosewater Cupcakes with Pistachio Frosting (GF). I love rosewater as a flavouring. I don't think I got the icing right because I didn't have a lot of experience in buttercream back then - it was too butter and could use the addition of milk to thin it if you're going to make them - but I'm learning!

September 2011 - The Ultimate Vanilla Cupcake (GF). Also, HAHAHA - I just realised that this page has had the greatest number of hits of any on this blog. And why, pray tell? Because it contains a picture of Ryan Gosling with his shirt off!


October 2011 - Donna Hay's Short Black Cupcakes. Tiny but mighty! They have quite an odd texture but they melt in your mouth. The fact they are mini-cupcakes also makes you feel virtuous when you eat five. Well, maybe not virtuous, but non-piggish. O, happy day :)

November 2011 - Pumpkin Cupcakes with Vanilla Icecream Frosting (GF). These were a little bit concave. I'm not quite sure what went wrong; maybe it was that there was too much moisture in the pumpkin, or maybe it was always going to be one of those gluten free cakes that will never perform like you want it to. But what it lacked in altitude it more than made up for in taste (plus, because you have to backfill the pothole with icing, you get more icing!). These will definitely be made again.

December 2011 - Christmas Cupcakes. Basically tiny little Christmas cakes, only without the drawn-out faffing about with soaking fruit in brandy for three days and cooking it for two and a half hours at a low temperature. Be careful not to overcook them because nobody likes dry fruitcake. Unless it's swimming in custard... which gives me an awesome idea for NEXT Christmas! I'll give you a hint: it involves injecting the cupcakes with something tasty. I'm officially a genius.

January 2012 - Chai Cupcakes with Caramel Frosting (GF). These were another absolute winner, not the least because they actually rose! I think the fact that I was so attracted to these, as well as to the pumpkin cupcakes, tells me that I like the spices that are common to both cupcakes. What can I say - I'm a spicy lass ;) Pity that the icing looks a little like poo, though.

February 2012 - Vanilla Cupcakes with Whipped Ganache Filling. I was a little low on inspiration in February. Life was busy kicking me in the pants so I figured the best way to deal with that was with chocolate. But not too much chocolate. So I made vanilla cupcake... and then filled and iced it with chocolate. The fact that the vanilla cupcake was just a means for getting chocolate into my mouth is irrelevant! I also just really wanted to use these super-cute sprinkles.


March 2012 - St Patrick's Day Irish Soda Bread Cupcakes with Whiskey Frosting. Oh yes, you can put whiskey into your icing, to be sure, to be sure! The cupcakes were a little odd because they were almost semi-savoury on account of the addition of caraway seeds, which I feel worked well with the icing. They also taste healthier than normal cupcakes because of the savoury-ness but, eyeballing the ingredients, this is but an illusion.

April 2012 #1 - Chocolate Heartache Cupcakes with Maple-Goat Cheese Frosting (GF). Wow. Just, wow. YOU NEED TO EAT THESE NOW!!! These contain no butter and no flour - eggplant takes the place of both. Which I would like to imagine makes them healthy, but we all know how chronically I suffer from imaginitis when it comes to that massive blind spot called my stomach! Now, if there was eggplant but no 200g of honey, and no 300g of dark chocolate, THEN I might be on the right track with imagining that they're healthy. Actually, honestly, they are a healthier alternative to your usual mud cake - eggplant contains nutrients that flour and butter don't but without the gluten or quite as many calories, and is also far lower GI than flour. But really, who cares. You  need to eat them. Now.

April 2012 #2 - Apricot Upside-Down Cakes. I chose these ones because they appeared to be relatively low calorie (for a cupcake), as well as being slightly better for you on account of using wholemeal flour and containing fruit.

And now, ladies and gentlemen, May 2012 brings us Coca-Cola Cupcakes with Peanut Butter Frosting!

This recipe is from SprinkleBakes.com and I halved the icing recipe... and still have enough left over to ice a few more cupcakes! I imagine if I got my pretty piping tips out I may have used it all up, but it's just so rich that I decided that less is definitely more.

CUPCAKES:
1c coca-cola
1/2c cocoa powder
4tbsp unsalted butter, cut into pieces
1/2c + 2tbsp castor sugar
1/2c brown sugar, firmly packed
1c plain flour
1/2 + 1/8tsp bicarbonate of soda
1/tsp salt
1 egg

Preheat oven to 175oC. Line 12-hole cupcake tin with cupcake liners (note that the mixture will stain the liner, so, if you observe the photos in the original recipe (link above), you'll noticed that the lovely Heather placed her cupcakes inside a second wrapper. I don't know whether that was for effect or because of the staining, but mine discoloured quite badly).

Heat coke, cocoa powder and butter in saucepan until butter melts. Add sugars and whisk until dissolved. Cool to room temperature then add the egg, lightly whisked.

Meanwhile, mix remaining dry ingredients in a larger bowl, then add coke mixture to it and mix.

Divide amongst 12 cupcake liners and bake at 175oC (350oF) for 20-25 minutes, until cake springs back when touched.

PEANUT BUTTER FROSTING (this recipe is halved and slightly changed):
2c icing sugar
1/2c unsalted butter
1/2c peanut butter (I assumed - and used - smooth but I suppose crunchy could also be used)
1/4tsp salt
1-2tbsp milk
Optional: sea salt, chocolate jimmies and crushed peanuts to serve.

Mix butters, sugar and salt until even in consistency and fairly smooth. Add milk slowly until you achieve the fluffiness you desire.

Mmm, desirable fluffiness...

Ice cupcakes when totally cooled.

Attempt to disregard the fact they contain in excess of FOUR HUNDRED CALORIES EACH!!!


 (do you like my new cupcake carrier? It has a rubber strip around the middle and can be adjusted to carry a normal-sized cake or a tall cake; or, one or two layers of cupcakes. I also discovered that you can carry one fairly flat cake AND a dozen cupcakes)

(I only added this photo because it was my favourite swirl)

As I said, super-high calorie... but also super-delicious. I never expected peanuts to go so well with Coke, but I suppose, when I think about it, I have eaten them together before.

Now, I'm off to jog off that cupcake, and lure one of the boys in the office into eating the last one so I'm not tempted! That's one of the best parts about working with mainly men - they are generally completely unconcerned with the impact of baked goods on their waistline, so I can still indulge in my love for baking, and eat one slice, and leave the rest for them. Win-win :)

Sunday, 22 April 2012

Year of the Cupcake #11: Apricot Upside-Down Cakes (diabetic friendly... allegedly...)

Depending on how often you read my blog, you may be aware that I have decided that I want to get a bit fitter in time for my 30th birthday *shudders* and also eat a bit more thoughtfully. So when my BFF Em and I decided to catch up for afternoon tea, I thought it would be prudent to choose something a little bit lighter on the calories as I knew I'd be going back for seconds ;) I got this from the Australian Women's Weekly site and are supposed to be diabetic friendly. They have a little under 140cal per serve, which isn't **that** bad (provided you only eat one!).

(as I write this, Em hasn't tried them yet but I have, and I think they're okay... but then, it's pretty hard to find me much happier than when I'm eating a bowl of Weetbix with banana or sultanas and a little bit of All Bran on it (I know, I'm a freak), so I'm probaly not the best judge of whether something wholemeal is tasty...)

I know that I'm kind of cheating making this my April entry for my Year of the Cupcake challenge because they didn't come in cupcake wrappers, and they were upside-down, but they were made in a cupcake tin! Huzzah!

INGREDIENTS:
1 tbsp + 3/4c brown sugar, firmly packed
12 canned apricot halves in syrup, drained
2 eggs
3/4c (90g) almond meal
1tsp vanilla essence
1/3c (50g) wholemeal SR flour
1/2c (125mL) skim milk
1/4c (80g) apricot conserve, warmed

Preheat oven to 180oC. Grease 12-hole muffin tin and line bases with little squares of baking paper. Sprinkle sugar (from the 1tbsp) evenly across holes and add 1 apricot half to each, cut side down.

Using an electric mixer, beat eggs and 3/4c sugar in medium bowl until light and fluffy. Stir in almond meal, essence, flour and milk. Divide mixture among pan holes (it will be quite runny).

Bake about 20mins. Stand for 5mins; turn onto a wire rack. Brush apricot conserve over hot cakes. Serve warm or at room temperature.

570kJ; 5g total fat; 19g carbohydrate; 1.5g fibre; 50mg sodium; medium GI.

I ended up brusing on blackberry conserve because it's all we had in the fridge.

They are quite a tasty morsel, as long as you like the natural sweetness of wholemeal flour rather than the overpowering sweetness of white sugar. The texture is rough, but not unpleasantly so, and the squishiness of the apricot keeps it interesting. I dare say that they would be wonderful served hot with a dollop of thickened cream, but I suppose that's defeating the purpose ;)

Sunday, 15 April 2012

The Daring Cooks: Create Your Own Recipe! plus Year of the Cupcake #10 - Chocolate Heartache Cake (GF)

Hello all. I've been a Very Bad Daring Cook of late, between my laziness and my surgery and some other bullplop stuff going on in my life and what have you. This month isn't really an exception, because the entire idea of Daring Kitchen is to extend yourself a bit and actually cook the challenges that they post! I hope the Daring Kitchen gods won't smite me...

I'm a Daring Cook and not a Daring Baker, because I already bake (more than I should!!! *pats food baby*) and I want to extend myself as a savoury cook. But I baked instead of cooking this month because of a last minute dinner invitation from a friend visiting from interstate, and also because I needed to bake cupcakes for my own Year of the Cupcake challenge. Yes, I am aware that I shouldn't leave things until literally the last possible day, but there was Easter and a trip to Brisbane and recovering from surgery and coping with returning to work, so I was sort of painted into a corner.

I had my recipe picked out, and the ingredients ready to go, and instead I ended up going to the exceptionally tasty Mamasita *drools* I have no idea whether it, or Taco Bill's, is closer to authentic Mexican cuisine, but Mamasita beats the pants off Taco Bills. Even though you may have to line up for extended periods of time to get in. Which we didn't, because we opted to have dinner at Nanna O'Clock (5:30pm)!

Our April 2012 Daring Cooks hosts were David & Karen from Twenty-Fingered Cooking. They presented us with a very daring and unique challenge of forming our own recipes by using a set list of ingredients!

Basically what we had to do was pick one from each of the following groups of ingredients and make a savoury meal out of it. I broke the "savoury" rule, but I did make something with three of the ingredients, and I'm really glad that I did because I have offically found THE WORLD'S BEST CHOCOLATE CAKE RECIPE!!! I'm serious. If you don't try this then there's no point in living.

No, I'm not prone to drama at all. Why do you ask?

These were the groups of ingredients:

List 1: Parsnips, Eggplant (aubergine), Cauliflower
List 2: Balsamic Vinegar, Goat Cheese, Chipotle peppers
List 3: Maple Syrup, Instant Coffee, Bananas

And this is the recipe I had originally picked out - meatloaf with BBQ sauce (contained vinegar and coffee), to be served with roasted parsnip. And then I had decided to kick it up a notch and caramelise the parsnip in maple syrup, and serve it with a potato and cauliflower mash, using goats cheese instead of butter to mash it. That obviously didn't happen. I used the Australian Women's Weekly (AWW) Recipe Maker widget to narrow down my recipes, where you just enter the ingredients you wish to use and it spits out recipes. The downside about the widget is that if it can't find a recipe with all the ingredients listed, it will just return recipes that include any of those ingredients and you won't know that until you read through the recipe.

Anyway.

I made Chocolate Heartache Cake, which various sources on the interwebs tells me is from Harry Eastwood's Red Velvet and Chocolate Heartache. Oh! And the interwebs also just informed me that Harry Eastwood is a she and not a he! Anyway, my understanding of the book is that most (all??) of the recipes contain vegies to reduce the amount of fat (butter) required, so theoretically they're not all that bad for you. Except for the part where it contains 200g of honey and 300g of chocolate...

This one contains eggplant, goat cheese and maple syrup.

CHOCOLATE HEARTACHE CAKE omgyoumustmakeitnowitwillchangeyourlife

2 small (400g) aubergines (eggplants)
300g good quality dark chocolate, chopped into small pieces
50g cocoa
60g ground almonds
3 medium eggs
200g clear honey
2tsp baking powder
1/4tsp salt (oops! Forgot to put that in...)
1tsp brandy (I used dark rum as it's all I had in the house *adjusts pirate eyepatch*)

Preheat oven to 180oC. Grease and oil a 23 x 7cm tin/pop cupcake liners in cupcake tin (I made thirteen cupcakes but could probably have squeezed fourteen out of it if I hadn't sampled so many stages of the recipe and accidentally-on-purpose left some batter in the bowl...

Stab your eggplants all over with a fork and put them in a covered microwave safe bowl in the microwave. (I added a wee drop of water because I was paranoid that it would shrivel and catch fire if I didn't, but I don't know if it made any difference. It certainly didn't burst into flames, anyhow!) Microwave for 8 minutes (I flipped it over half way through), remove from microwave and drain any juices in the bowl and let it sit until it's **just** cool enough to handle.

Strip skin off it (you may need to scrape some flesh off the inside of the skin - don't waste the eggplant, but also don't get any bitter skin gunk in it), puree it and then add the chocolate and stir it around. The hot eggplant will melt the chocolate. Stir until smooth. Pick out the big chunks that refuse to melt and eat them to confirm that eggplant and chocolate actually do go well together.

Meanwhile, mix all the other ingredients together and then mix the eggplant mixture in.

For cupcakes, bake for around 20 mins (check at 18mins because mum's oven sucks at regulating temperature). For cake, bake 30 mins. I judged them to be ready when the skewer came out with moist crumbs (but not liquid) stuck to it. I put them on a rack almost immediately but the recipe says to leave the cake in the tin for 15 mins first.

GOAT CHEESE AND MAPLE FROSTING

60g cream cheese
120g goat cheese
1-2tbsp maple syrup (according to your tastebuds, and a darned fine excuse to eat frosting!)
2tbsp icing sugar

Beat cheeses together until light. Add the maple syrup and sugar and beat until mixed well. Spread on cooled cupcakes.

What can I say about these - they are moist and they are dense and they are wonderful. The honey as the sweetener is a much more exotic flavour than the usual old castor sugar that goes into most mud cakes. It seems a little bit Middle Eastern, what with the honey, almond and eggplant; and the lack of butter makes it seem lighter. Perhaps it is the serving size (cupcake!) but I wasn't hit with a sugar rush or that Cake Regret feeling you get with some baked goods. It is altogether out of the ordinary, and all those little quirks in the recipe takes it above and beyond a normal chocolate/mud cake. As Boy would say, it's like Taylor Swift and Rachel Bilson are making love on your tongue. The idea doesn't appeal to me as it does to him, but I think I understand the sentiment...

Please disregard the fact that there are only nine cupcakes on this tray.

Can't imagine why...

Friday, 6 April 2012

Cupcake Decorating Course #2

Well, Rachel and I love cake so much we just couldn't help ourselves. After we had booked into the first cupcake decorating course, the one that had originally piqued our interest in such courses came up for an absolute bargain on one of those online deals websites ($50 instead of the usual $125), so we enrolled in that, too!

The second course was run by Jennifer Graham of Crabapple Cupcakes, and was totally different to the first course. I'm not quite sure which of the two courses you would say was "better". They were just different.

I must admit when I first walked in I was fairly skeptical that the course was going to be of any use at all. It was held upstairs in a restaurant in the city (it was closed for the night and we had the place to ourselves), and the furniture had been rearranged so that there was a big, long table in the middle and chairs absolutely jammed down the sides of the room. Because the majority of bakers do not actually fit onto a smallish chair without oozing over the sides a little, it was a wee bit squeezy!

My first impression was not good. There was a row of buckets of buttercream frosting in different colours, as well as various sprinkles, cachous and pre-made royal icing flowers. I was quite seriously concerned that we would be doing something I could very easily do on my own.

Then Jennifer opened her mouth and my heart sank a little bit further. It seemed like she was going to waffle on in a sales pitch about cake like it was a religion, and if there are two things I hate it is sales pitches, and people trying to force religion on you. And then I realised that we were all there because, to most of us, cake IS a religion. Once I realised that I was good to go. Huzzah!

We didn't learn a great deal about decorating that I didn't already know, but there were a few really good take-home cupcake baking and decorating tips:

1) Bicarb soda is used instead of baking powder where there are acidic ingredients such as buttermilk or chocolate. It also tends to give a browner/more golden finish on the cake

2) Following recipes correctly is important. Details like how long you beat cake batter for, not to overbeat it, recognising what "light and fluffy" looks like etc are important

3) Repeatability is paramount in cupcake decorating. You want them all to be identical, and you need to know exactly how much icing you put on and exactly how many times you turned the cupcake as you applied the icing

4) Always decorate in circles or arcs, not squares. Squares need to be absolutely perfect, and not only do they need to be perfect, but the entire display of cupcakes then needs to be lined up, too, and if one is off just a little then it looks terrible. Curves = good; square = bad

5) Ingredients should be at room temperature when you add them to the mix

6) You should get an oven thermometer so you know what temperature you are actually baking at.

They're the key messages. And now for some pretty photos!


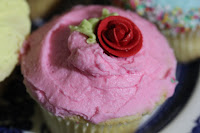
Jennifer also gave us a handy information booklet with a recipe for basic vanilla cupcakes and buttercream frosting, which I will share with you in another post. She also taught us quite quickly how to pipe a rose but either I wasn't paying attention or I'm just not very good with my hands. Basically I want to know how to make those sugar flowers because it will be a hell of a lot cheaper to make them myself than to buy them! In case you couldn't tell, I loved those red sugar roses.

Anyway, if you get a chance, the Crabapple Bakery cupcake decorating course is good fun. In some ways I preferred the one we did at Marg and Maree's  - the class there was much smaller and there was more focus on learning each decorating technique then practising, then learning another technique and then practising; rather than the Crabapple one that was basically a two hour lecture followed by half an hour of decorating however you want with the techniques used, under guidance. Mind you, there were about forty people in the room as opposed to the twelve at the other course, so there was less guidance and some students got frustrated and slipped through the cracks a little. But I think it was worth doing the course nonetheless, just to pick up the tips listed above.

And hey, with either course, you get six free cupcakes!

Tuesday, 27 March 2012

Year of the Cupcake #9 - St Patrick's Day Irish Soda Bread Cupcakes

I learnt a few things whilst making these cupcakes - one, sometimes savoury flavours can work surprisingly well to balance out sweetness; two, the smell of Johnny Walker in your buttercream frosting is a little unexpected and overpowering until you get used to it, but it's okay in the end with the relatively plain cake; and three, gel colours seem to darken/intensify as they dry, which I wish I'd figured out sooner! Nonetheless, I was quite pleased with the outcome.

I made these for St Patrick's Day, when two friends came over to watch Gone With The Wind with me (thus knocking out two 101 Things challenges in one hit. Whoohoo!). I thought it was quite fitting that the O'Hara family was Irish, that Scarlett's favourite colour was green... and so were the cupcakes. So green, in fact, that you probably wouldn't want your kid to eat that amount of food dye shortly before bedtime!

This recipe is from Gail Wagman's Cupcakes Galore, which is quite an interesting book as it gives you a bit of insight into the science behind baking that had never before been explained to me. Of course, this may be just because I've never read a cookbook from start to finish before, recipes included, but I'm starting to realise that it's quite a valuable (if time-consuming) exercise. It contains other gems such as Beer & Peanuts cupcakes, Apple-Cranberry cupcakes, Brownie cupcakes, Courgette Pine Nut cupcakes, Chocolate Malted Milk cupcakes, Pina Colada cupcakes and Peach Melba cupakes. Quite a mixed bag, mostly inspired by existing foods and drinks. I'm not entirely sure but I think it was bought at QBD books, a discount book seller. One presumes it is also available online.

To the recipe! Makes about 16 cupcakes (I halved the mix)

CUPCAKES:
300g plain flour
1tbsp oatmeal (I used quick oats as they're smaller; I imagine you could finely chop rolled oats)
2tsp baking powder
2tsp bicarbonate of soda (apparently this is used where acidic ingredients such as buttermilk are present)
1tsp salt
125g unsalted butter, room temperature
200g sugar
2 eggs
180mL buttermilk (can substitute normal milk with a dash of white vinegar to make it go chunky... which, eeuw...).
75g dried currents or raisins (if you use raisins, chop them. Or use sultanas)
1tbsp caraway seeds (optional)

1. Preheat oven to 180oC
2. Mix dry ingredients together and set aside
3. Cream butter and sugar until light and fluffy. Add eggs, one at a time, beating well after each addition. Alternately beat in flour mixture and buttermilk. Fold in currents and caraway seeds.
4. 2/3 fill cupcake papers. Bake for 25mins or until a tester inserted into the centre comes out clean (consider baking for a couple of minutes less as mine were a little dry... but then, I did leave them on the bench for quite a while before decorating...). Remove from the oven and cool. Marvel at how they kind of do resemble soda bread.

IRISH WHISKEY FROSTING:
60g unsalted butter, room temperature
300g icing sugar
Pinch of salt
2tbsp Irish Whiskey or Bailey's Irish Cream (I ended up using Johnny Walker as it was the only suitable-ish thing my local bottle-o had in a flash, and there was no way I was buying an entire bottle of good whiskey (which I don't drink) to use 2tbsp!)
Green food colouring and green sugar/sprinkles/whatever for decorating (I made shamrocks out of royal icing. Go me!)

Cream butter, sugar and salt until light and fluffy. Slowly add whiskey (and food colouring, if using) and beat until frosting is of good spreading consistency. Frost cooled cupcakes and decorate as desired.

LITTLE TINY SHAMROCKS:
Royal icing (which I make from 2 eggwhites and approx. 2c sifted icing sugar, but I don't know if that's the right ratio, it's just how I do it! Best you Google it...)
Green food dye

Make royal icing with green food dye - whip until stiff peaks form. I have no idea about the science of this!

Line a tray with baking paper. Using a large plain writing tip, pipe a short line and three blobs as below. It's best if you pipe the top leaf last and drag the tip back towards the middle a little to make it look more like a leaf.

Dry overnight. If possible, flip them over once the top is solid to give the undersides a chance to dry off. They're quite bulky so they may take a couple of days to dry completely (which is only important if you plan on making a surplus of them and storing them - as long as they're solid enough to move they're okay for immediate consumption).

You will need quite a bit of practice to get your hand in at piping. At least, I did, but that may be in part because I haven't done a great deal of piping before, and also because I was still recovering from surgery and didn't have the complete use of my right arm or the ability to raise it above my shoulder or hold my hand on certain angles. All in all I think I did okay! Anyway, I guess it's just testimony to my speshul piping skills but it took this many shamrocks to get eight that turned out well enough to decorate with.

Some turned out quite well.

Others turned out quite... inappropriate for putting on cupcakes. This shape seems to happen to me a lot. I wonder if that means anything...

Decorate as you please. I tried out a few different things but in the end, the simple shamrock and some gold edible glitter (to represent the pot o' gold at the end of the rainbow, of course!) looked the best. Enjoy with a cup of tea to attenuate the effects of the food dye.

Belated St Patrick's Day wishes to ye!

Sunday, 19 February 2012

Cupcake Decorating Course

A little while back, my Regional Manager and I discovered a mutual love for all things baked (making AND eating!), so on the weekend just passed we participated in a cupcake decorating course at Marg and Maree's in Heidelberg, Victoria. I had no idea they existed until quite recently, and I'm really glad that I stumbled across them. Not only are they relatively close to home, but they offer shorter, cheaper baking and decorating courses for those who are not so keen to spend several weeks running learning skills. From what I can see a lot of them are bite-sized classes (pardon the delicious pun!).

The course mainly focused on basic decorating techniques and provided us with ready-made icings, but also gave a bit of information on how to make those icings. I'd be lying if I said I would never be tempted to dive in and buy pre-made products, but I do like to learn to make things properly myself before resorting to the cheaty way.

We learnt about piping melted chocolate, baker's icing (which is similar to what you find on doughnuts or coffee scrolls) and American-style buttercream. It wasn't about the fine detail like you see with royal icing; it was about simple, effective, readily-replicated techniques.

First we were taught to pipe melted dark and white (with oil-based red/pink colouring in it) into shapes. We used templates for the dark chocolate ones but soon enough you learn to make them free-hand. As the instructor Maree said, once you take it off the template, nobody will know the difference anyway!

We were also taught to melt compound chocolate in the microwave - hitherto I have burnt it but I think I will be more confident about it in the future.

Next up, we glazed a cupcake with baker's icing, which was really easy and only requires a little judgement regarding how much icing to put on without it running over the edges.

We were also taught to make shapes with sugarpaste, including hearts and butterflies, which were placed between sticks to allow them to set with their wings up. Cute!

Then the piping began (I wish I had pics of the practice runs on baking paper, but I don't because I was - scandal - busy practicing piping! So you'll have to use your imagination) - big stars,

little stars and random squiggles (aka cornelli lace, which I have royally stuffed up in the past),

big swirls,

(notice the glitter? Special edible glitter, of course!)
leaves (I wish I could say I made the flower myself, but alas I did not... but the leaves were jolly well hard enough!)

and ruffles (which you'd think I'd be better at after attempting the ruffle cake, but no).

And then we put them all together in various ways, and they were so pretty.

I really wish I'd done this sooner! I still don't have much of a visually creative streak, but I am actually beginning to think that it's something I am capable of - once I know what's out there. I'm that way with most things - I need to understand the mechanics of it before I can freestyle, and I firmly believe that, whilst some people are naturals, most people require a lot of practice. And I'm one of them!

If you're a bit of a baking enthusiast I highly recommend getting a little guidance with decorating. YouTube and the interwebs in general are great for picking up information, but nothing quite beats a real-life instructor.