Showing posts with label cake. Show all posts

Friday, 2 May 2014

AWW Passionfruit Buttermilk Syrup Cake

I've been sulking about my recent stay in hospital for too long. Yeah, I'm still recovering from having the pacemaker replaced, and I do get stabs of pain from time to time, but I think I'm ready to put a more positive spin on things. And what more delicious way to do that, than to bake a cake!
 
I baked this one while I was recouperating at my mum's house, and had just decided that I had enough strength back in my right arm to put it through its paces and do something besides watch Game of Thrones. I chose it because I knew we had the ingredients in the cupboard already, and also because I knew it wouldn't actually take a great deal of strength or control in my right arm, as decorating a cake properly would have.
 
This is technically a syrup cake, thanks to the icing, and is magnificently buttery. It keeps quite well for 3 or so days. I say "or so" because I can't remember whether it was three or four, but if I'm honest with myself, I can't imagine that it would have made it far past Day 3 with my mum and I circling like vultures!
 
It's from the Australian Womens Weekly book Bake. Something I'm becoming more mindful of these days is trying to cook new recipes from my multitude of cookbooks, rather than reverting to the same old recipes again and again, and I had never tried this one before. Unfortunately, due to my wikkid skillz in selecting delectable recipes I tend to pick good ones, so I suspect this will become one recipe that I come back to because it was the perfect balance of buttery and tangy. Oh well, I suppose there are more tragic things in this life than cooking the same recipe over and over!
 
A copy of the original recipe can be found here on the AWW website.
 
Note that the recipe on the website tells you to bake it for 40 minutes in a bundt tin. I didn't have a bundt tin available to me at mum's, having relocated it to my new house (have tins: will travel!), so I baked it in a normal-sized, round tin. I think it was about 8" across, give or take. The supplementary instructions in the margin of the recipe say to cook it in a normal, round tin for about an hour. I think I cooked it for about an hour and five minutes, but as per usual I advocate aiming for five minutes less, testing it for doneness, and then putting it back in.
 
As per usual, I am incapable of sticking to the method. By which I mean, I suffer from the devastating afflctions of having the attention span of a bush fly; a rampant will of my own; and an above-average knowledge of all things baking. I'm that annoying person that sits in front of My Kitchen Rules and shouts "you're doing it wrong!" even if I've only cooked it once before. But rest assured that the cake came out wonderfully using my method, although if anyone clicks through and uses the original recipe from start to finish, please email me and tell me how it went!
 
INGREDIENTS:
250g butter, softened
1c castor sugar
3 egg yolks + 3 egg whites                                             
2 c SR flour (I used plain flour and added 4tsp of baking powder)
¾c buttermilk (I used normal milk and added a teaspoon of white vinegar, stirred and let it sit a while)
¼c passionfruit pulp *
ICING
1½c icing sugar
¼c passionfruit pulp, approximately *
 
* Note that between the two, it adds up to around one small tin of passionfruit pulp like we get here in Australia. You know the tins that are the same size as tomato paste? Yeah, them. I think I've seen Admiral, Ardmona and John West make them, although I'm sure there are other brands out there.
 
Preheat the oven to 180oC (160oC F/F). Grease and flour an 8-9" round, 4" deep tin, which I strongly suggest you do out on your back lawn to make the clean-up easier later - flour will go flying when you bash the tin to discard the excess. Or you could grease and line it instead. Hmm, I wonder if anyone has done the carbon footprint calculation on those two options...
 
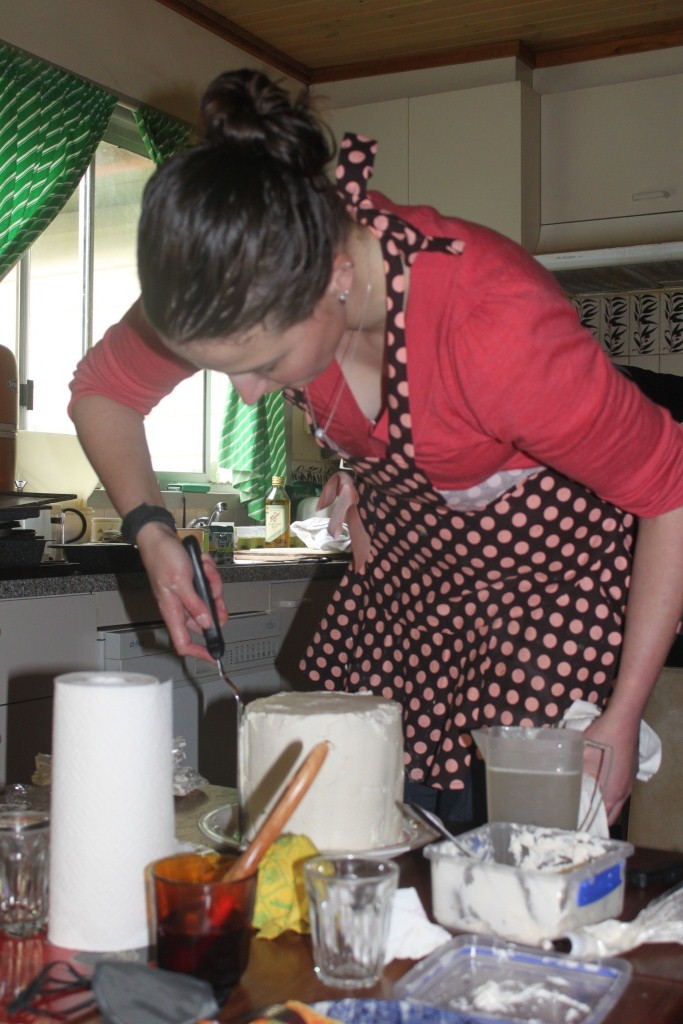
Anyway, this is where I really diverted from the recipe. I was about to pull out mum's Kenwood when I realised that I broke it about a year ago. Well, okay, I didn't break it. It broke itself. I was sitting there, minding my own business, waiting for it to mix something, when it threw a gear. It still functions, but only on super-duper-high-speed, which I thought was a bit extreme for this cake. It's not like I was whipping cream or anything. 
 
So I cut the butter into four slabs (if you're playing along in the States, you're looking at around two sticks of butter, so cut them once lengthways), put them in a microwave-safe bowl and microwaved them for about ten or fifteen seconds. The aim here is to make it soft, but not melt it. There was a wee puddle of melted butter in the bottom of the bowl, but it mostly held its form quite well.
 
Next, I dumped the castor sugar in and beat it in with a wooden spoon. I went about as hard and as fast as I could, until it was a bit paler and fluffier in colour. Obviously it wasn't even close to what the mixer could do, but I think considering the fact my pectoral muscle had a hole in it, I did pretty well!

Next, I dipped my finger in and ate some butter and sugar to confirm it was stil just as delicious at this stage as it has been the other 12,496 times that I have tried it. Man, I love that part! Then, quick as a wink, I dumped the egg yolks in and mixed them through to prevent me from eating any more of it. It's a pretty good dis-incentive, I have to say. Raw egg grosses me out when I've just seen it (and yet, I happily eat cake batter, not to mention chocolate mousse which has both raw egg yolk and egg white in...go figure). 

I then alternated adding flour and milk, starting and finishing with flour - flour, milk, flour, milk, flour. I'm not sure why, but I'm pretty sure I remember reading somewhere that it was important, perhaps because you have more control over the moisture? I dunno. Anyway, I guess that kind of became irrelevant here, because you then dump the passionfruit pulp in and stir it until it is mixed in evenly, which really means you have very little control over the moisture content after all! But old habits die hard, and it's good to get into good habits.
 
Next (that's a dirty great lie - I did it first and set them aside, and I suggest you do, too. I like to not muck about once I've added liquid to a product containing a leavening agent, especially if I'm working near a hot stove - you don't want it reacting before you're ready for it to do so) I whipped the egg whites into stiff peaks using the whipping/beating attachment on mum's stick mixer (kind of like a Bamix, but with more accessories). I then gently mixed 1/3-1/2 of the egg white in - I refer to this quantity as the "sacrifical egg white", because, let's face it, the air is going to be squashed out of it by the dense cake mix. But the purpose of mixing it in first is to lighten the batter, so that when you go to fold the rest of it in, it doesn't fall totally flat.
 
Scrape the mixture into the tin, leaving just enough residue  to satisfy your ridiculous craving for cake batter (but without affecting your desire to eat the finished product), then put in the preheated oven (my preferred shelf spacing is a little above half way up, so it browns but doesn't burn) and bake for about an hour, give or take. Cake is done when it springs back when touched lightly.
 
Remove from oven, leave to cool in tin for about five minutes and then turn it out right-way-up on a wire rack to cool.
 
Once cool, ice it with the syrup icing. For the syrup, mix the icing sugar and passionfruit pulp together. Microwave (or you could do it in a saucepan) for... uh... I think I did it in 20 second bursts, until it was hot and the sugar was starting to dissolve. I then poured it carefully and evenly over the cake, so that it covered the top and the sides. I also didn't completely melt it, because I wanted it to penetrate but I also wanted it to have a bit of coverage. Look at it, sitting there, glistening with unforetold potential!

Anyway, this is what it looked like whole, before I iced it. The above picture were taken at night so they don't really capture the golden-brown perfection of this cake, so I thought I'd throw it in for you. Makes you hungry, doesn't it. And it smelt just as good as it looks while it was baking!

And this is what it looked like in the cold light of day. 

And I can assure you, you will be going back for a second piece. Maybe even a third. No judgement here!

Bon appetit!


Monday, 27 August 2012

Cake Decorating Class: Wilton Gumpaste and Fondant, and How To Fill A Layered Birthday Cake

I didn't realise until yesterday just how long it has been since I posted here, and I only realised because I offered to write a guest post over at magnetoboldtoo and then my head exploded when I realised how much time writing even a short post can take, especially when it involves pictures and links. At the time of publishing this my guest post hasn't gone up yet (I didn't write my blurb in a timely fashion due to the below festivities), but I'm sure it will be in the next week or so and will let you know when it's out there. It's about how chokos are the knobbly, green symbol of my overcommitting myself.
 
Don't be a choko.
 
But I didn't drag you all down here to chat about chokos (although I will be posting about what I did with that choko some time in the near future. It will probably be entitled Chokos: A Very Confusing Vegetable).
 
Nope, I dragged you down here to tell you about the cake I made for my BFF Emma's 30th birthday. There will be another post that comes later, telling you all about the other three classes I did leading up to the final class of Wilton Gumpaste and Fondant (where I made the bottom tier of this one), but for now I'll just show you the finished product from the final class and take a quick moment to admire the cake before I tell you a bit about what went into it.
 
The brief was "I WANT A PINK BIRTHDAY CAKE!!! PINK, I TELLS YA!!! PINK, PINK, PINK!!!" (disclaimer: the phrasing of the cake brief in no way resembles what came out of the birthay girl's mouth, except maybe the words "pink" and "cake").
 
So I decided that it was going to be pink, inside and out, dagnammit! And a little bit of food dye goes a long, long way.
 
It took a little while to get the shades different enough from one another, and you also have to use your imagination because the colours develop when you apply heat and time.
 
So I now had two four-layer cakes. Baking multiple layers is a bit time consuming and so unless you really love the person you're giving a layer cake to, or they're paying you for your time, I'd probably go down the path of a single cake that has been torted in the future. Or maybe swirls. Swirls would be okay.
 
There are no pictures of how to cover the cake because it all happens too quickly and requires both hands, but I will tell (and show) you how to fill a cake: 1) Pipe buttercream around the outside of your cake layer to create a "dam";
 
2) Fill the "dam" with your filling of choice (in this case it was white chocolate and raspberry ganache in keeping with the PINK theme);
 
3) Sandwich the next layer on and press down gently and turn slightly; 4) You may wish to refrigerate it to set it a little, or put skewers in taller, multi-layer cakes to prevent them from sliding - just make sure that whoever cuts the cakes is aware that they are there!
 
This is the tier I covered at home. The problem I had encountered during class - the corners cracking because the fondant on the sides dragged it down and I didn't catch it in time - was not one I repeated in this tier. My corners were just fine. Unfortunately, the sides were not. They kind of wrinkled and I don't know where I went wrong or how to fix it. If anyone can let me know how to prevent wrinkles that would be super! My instructor didn't tell me how to deal with them because they simply didn't happen to anyone while she was watching. Maybe it's because it was a taller, narrower cake. I don't know *sighs* On the plus side, I now knew which side the back would be! I also made the mistake of covering it in relatively poor lighting, and, upon examination in daylight, found a couple of air bubbles that it was too late to fix. Oh well, live and learn.
 
The board is covered with fondant (Lesson 3) and the daisies were taught in Lesson 2. The frills were taught in Lesson 4, along with how to stick the cake to the board (CMC glue and a couple of small balls of fondant).
 
Altogether I am fairly pleased with the cake. There was quite a bit of damage in transport, and I think next time I make a multi-tiered cake involving frills I will have to apply the ones on the top layer at the venue (or else transport it already assembled. This makes me very nervous!). I also have to be less clumsy with my hands - I kept knocking it when I was decorating because I'm not terribly spatially aware. Be especially careful with your tools, and, until you're quite practiced at it, I suggest removing rings, too. And that row of three daisies weren't part of the original plan, but some frilling fell off in transit so they're hiding the damage were always supposed to be there.
 
Onward and upward!

Tuesday, 10 July 2012

Date and Chocolate Torte

Not so very long ago in a land not at all far away (might have been this very chair, in fact), I came across this recipe on Hotly Spiced, an always-amusing food blog. Charlie is a great story teller, so I find myself popping over a couple of times a week to see what recipes she has up her sleeve and what story she has woven around it.

On this particular day I was suffering a surplus of egg whites on account of the lemon curd and ice cream I had recently made. The single paltry egg white I used for the meringe in that recipe wasn't quite enough to balance out the yolks so I had seven sitting in the fridge, thinking about what they would become (macarons were a vauge possiblity, but I'm still a bit scared of them). So when I stumbled across the recipe Charlie had posted for date and chocolate torte it was like a sign from above. It's from the Vogue Australia Wine and Food Cookbook... 1985! AND it's gluten free.

Preheat oven to 180oC. Grease a springform tin and line the base with baking paper.

Roughly chop 250g of each of dark cooking chocolate, dates, and almonds (skin still on). I used the stick mixer's food processor and found that the chocolate became jammed on the side of the bowl so you could really only chop one row at a time. Quite frustrating! You'll also need to hold it with two hands because once it starts chopping it kind of tap-dances on the bench.

Whip 6 egg whites until stiff peaks form and gradually add castor sugar, beating until it dissolves/disperses. Fold in almonds, chocolate and dates (I did this in a couple of batches so as to not completely flatten the meringue mixture).

Spread in tin and bake for 45 minutes.

Switch off oven, open oven door slightly and allow to cool in tin. If you're not me, once it's cool, turn onto platter, cover and refrigerate overnight.

If you are me, cool for about half an hour then carefully remove from the tin while it's still kind of warm and melty.

Serve it up with a round of double cream and some granny smith apple slithers (I like the tartness to balance the sweetness of the chocolate and dates; I imagine strawberries or raspberries or perhaps even nectarines would also work well).

Thanks for the recipe, Charlie!

PS - I did the maths and it has 338cal per serving (1/12th of the torte), without the cream. Not too bad considering its extreme deliciousness!


Monday, 25 June 2012

Rainbow Cake

All the cool kids are doing it. And I'm not talking about smoking pot or getting your belly button pierced or giving *cough* unnecessary levels of affection to boys at parties or drinking bourbon/vodka/whatever the week's "in" drink is until you spew or pashing your bestie's boyfriend.

No. We've (okay, they've - I was never a cool kid) all reached a higher level of maturity now (one hopes) and baking is cool again. Did ya get the memo??

(I would like to go on the record as saying that I was baking before it became cool again, so perhaps it is I who is responsible for the resurgance... Yeah, I don't buy it either...)

And these ladies are doing it in style -
Rosie, aka Sweetapolita
Susan, aka ChocolateSuz
Kaitlin, aka Whisk Kid


If you happened to click through you'll notice a glow that I think Kaitlin started and Rosie fanned into a healthy flame. Actually, Martha made it really famous but Rosie brought it to the forefront of the bloggy world, as far as I'm aware. (And, on the side, how awesome would it be if Martha found something she liked on my blog and re-published it??? That would be AWESOME!!!)

That's right, I'm talking about the rainbow cake. It has been on my 101 Things list, mocking me, for around 350 days... And I finally made it! It was for my BFF Kaye's birthday and due to a few dietary issues amongst the consumers I made it gluten and dairy free. So yes, I was a Betty Crocker Cheat because hey, when you need to muck about dividing your cake batter into six precise batches and then dye them you don't really want to be mucking about with from-scratch baking. Actually, I was a Basco Cheat, but let's not split hairs.

2 boxes of Basco sponge cake mix, 6 eggs, 1c water, 200g dairy and gluten free white chocolate, 1 small carton lactose free cream (UHT), 1 bag frozen raspberries, 1 tub Nuttlex and 2 bags pure icing sugar. Oh plus essence of your choice to make the Nuttlex buttercream you will make taste less feral. And food dye - I have the Americolor student kit.

Make up cake mix, divide into six bowls evenly by weight, dye whatever colour you want (I went red-orange-yellow-green-blue-purple, using my Americolour student kit, and put about 2 drops in each, with the exception of the purple/violet which I added a drop of fuschia to in order to give the colour a bit of depth), and cook in pairs in greased, lined sandwich pans (I used industrial Pancoat but assume the usual grease/line business is the go. Follow the directions on your cake mix box!). Bake for about 30% less time than the mix specifies, because the cake is much smaller and will dry out much faster.

Meanwhile, make the ganache. Heat up cream until bubbles form, then remove from heat/microwave and add chopped white (lactose free - Woolworths stocks it, at least, they do online) chocolate. Allow to sit for a moment, then stir until of a consistent texture. Now, I was winging this step so there was a bit of trial and error involved. I ended up tipping off a whole lot of cream that I shouldn't have, and ended up with a solid mass when I left it overnight. So, back to square one and luckily I had a second carton of lactose free cream on hand! I used about 1/3 of the second container so I imagine you need at least 1/2 a container, if not 3/4. Anyway, allow this to set in the fridge. It shouldn't be rock solid, just pleasantly thick and stirrable. You can whip ganache which was my original plan, but my first lot was too hard and the second lot was too runny!

Meanwhile-meanwhile, defrost the packet of raspberries (i.e. leave on the bench) and once they've thawed, cut the bottom corner off the bag and balance it on a heavy whiskey tumbler (or similar) to drain the juice out. Once that's done, add the raspberries to your white chocolate ganache and smoosh around. Resist the urge to eat it because even though it's lactose free and has that distinct, sweet, soy flavour about it, it still tastes really nice!

Meanwhile-meanwhile-meanwhile, make up some buttercream. Mine was dairy free, using about 2/3 of a tub of Nuttlex and close to 2 bags of pure icing sugar. I was too lazy to sift it so I didn't. I just whipped the Nuttlex up with it and kept adding icing sugar until it tasted right and had the texture I wanted (fairly fluffy). I also added a big spoonful of vanilla bean paste to take away the icky Nuttlex flavour, which gave my cake a grainy, rustic finish which I quite like.

Brush cooled cakes with a bit of the raspberri juice to moisten them (because I bet you overcooked it like me). Don't go too nuts - you don't want soggy cake. Then, using a #12 tip (large-ish round), pipe a dam with buttercream because you know your ganache is too runny to stay put!

Use 1/5th of the raspberry-white chocolate ganache per layer. Repeat the process, starting from the bottom layer and working your way up (purple-blue-green-yellow-orange-red) like so: brush with juice, pipe a dam, fill the dam with ganache, add the next layer. Repeat. I cheated in coating the cake because I have a large plastic piping tip that looks a lot like the narrow slot hairdryer attatchment which makes it far easier to cover the sides of a cake - you pipe the icing on, and then smooth it out. Have a friend take a photo of you smoothing icing at the kitchen table which is clearly too low a work surface for you, where you can't quite tell which part of the photo is in focus but suspect it may be a polka dot on your apron.

Decorate with cute li'l flowers you learned to pipe in royal icing the day before. (I'll write a tutorial on that one day, I promise!) Admire your handiwork.

And when you cut into the inside, prepare to be amazed. Even though you know exactly what's inside you will still be amazed.

Now, don't forget that you need only eat a verrrrrry skinny slice, because it's basically two cakes stacked atop one other. And you'd better believe that people will volunteer to bring cake home with them, and that all that will remain is a shattered, desolate slice.

Not to bad for gluten free, lactose free cake! And now I've checked another thing off my 101 Things list. Whoohoo :)

Thursday, 21 June 2012

A Jubilee Afternoon Tea, Part Two - Apple Streusel Cake, and Mini Crustless Quiches

If you've been following along, you may recall that I had an afternoon tea a couple of weeks ago in a small nod to HRH Queen Elizabeth II's 60 years of service. That post mainly contained some very half-@rsed recipes for sandwiches, which, duh, and a link to a scone recipe that I first posted quite some time ago.

Today, I will attempt to actually provide you with a meaningful recipe to make ammends for the last one. And then I will post a half-@rsed mini crustless quiche recipe below it. Again, the photos aren't any better than in the last post, but let's face it - eating the food is far more important than taking pretty photos!

APPLE STREUSEL CAKE (from AWW Bake)

1/2c plain flour (plus the below)
1/4c SR flour (plus the below)
1/3c brown sugar, firmly packed (plus the below)
1/2tsp cinnamon
80g chopped butter (plus the below)

200g softened butter
2tsp grated lemon rind
2/3c castor sugar

3 eggs

1c SR flour
1/2c plain flour
1/3c milk

25g butter
5 medium (750g) apples, peeled, cored, quartered and finely sliced
1/3c brown sugar.

Process the first 5 ingredients until they come together (mine came out like fine bread crumbs and I then had to squish it with my hands to make it come together, but even so it was crumbly. But who cares, because it tasted AWESOME). Wrap in gladwrap and freeze 1hr or until firm.

Beat the second group of ingredients until fluffy, then add the eggs, one at a time, until mixed. Do not over-mix.

Add the fourth group of ingredients to the batter in 2 batches (wet-dry-wet-dry), spread in greased, lined, 22cm round tin and bake at 180oC for 25 minutes.

Meanwhile, melt the butter from the last set of ingredients and cook the apples for around 5 minutes, until brown. Add the sugar and cook for 5 minutes more until thickened.

At the 25 minute mark, pull the cake out of the oven and, working quickly, spread the apple mixture across the top of the cake and top with grated streusel mix (mine was more of a crumbly powder which I poured evenly across it).

Bake for around 25 minutes more, stand for 10 minutes in the tin then turn onto a rack (I did this by putting foil over the top, turning it onto the foil then turning it, right side up, onto the rack). Serve warm or at room tempterature, preferably with a little cream. Yum.

Mmm, delicious, crumbly top... *drools* I think it's supposed to be chunkier and crumblier, but I liked mine just fine. Don't be fooled into baking it for longer to try and crisp the top up, because it won't work. It will only dry the cake out. Trust me, I'm a doctor (actually, I'm not).

HALF-@RSED MINI CRUSTLESS QUICHES:

For each batch of 12 or so mini quiches (made in a 12-hole, rounded-base patty pan tin), you will need 4 eggs, a slosh of milk and whatever you want to put in to flavour them. I imagine the more milk (or cream) you put in it, the less eggy the filling and the more... custardy? Quichey?... it becomes.

Spray the tin with oil spray, beat the eggs and milk until of a consistent texture, add fillings such as the following and bake at... gosh, I think it was about 190oC for around 10-15 minutes. Just keep an eye on them, okay? They'll puff up when you cook them, and then fall when you take them out of the oven.

The fillings:

Cherry/grape tomatoes, halved, oven roasted with some oil, salt and pepper. Mix a big squeeze of basil from one of those Garden Gourmet tubes into your egg mix and spoon into the pan, then pop one or two of these puppies on top.


OR

Baby spinach, wilted in a wee bit of olive oil, and some (home made, in my case!) feta cheese, crumbled. Mmm, home made cheese tastes so smug :)


Or, prosciutto, chopped up finely (this picture makes me so happy. As did eating several slices of prosciutto before I reminded myself that I actually needed to use it), and a handful of grated cheddar.

This lot were a little bit on the eggy side, but I guess that's what happens when you don't use a recipe! They were still tasty, though, especially the spinach/feta ones. And so quick, and, compared to the ones with pastry cases, low calorie. Which should balance out that cake with its dollop of cream quite nicely :)

Sunday, 13 May 2012

Wilton Cake Decorating Course - Decorating Basics, plus Cut-And-Keep Butter Cake recipe

For a little while now I have been quite keen to get a handle on cake decorating. You may have realised this considering that I have now attended not one, but TWO cupcake decorating courses... and if you didn't figure it out from that, then I guess you're just a little bit slow off the mark. Either that, or maybe you just thought I liked cupcakes. Which I do. And now, for a touch of irony, scroll down to see the cake we made in class...

Anyhow, yesterday morning I attended the first of three consecutive Saturdays of Wilton cake decorating courses at the Greensborough Cake Decorating Centre. Normally they are held over five weeks, but they do offer the option of running four of the five lessons in pairs, so we covered lessons one and two out of the Wilton Decorating Basics Lesson Plan.

I just realised that this is going to come across as a huge plug for Wilton products, but that's because it happened to be a Wilton class. What can I say - I'm a sucker for structured lessons! The lessons do come with a student kit which includes things like piping bags, basic piping tips, couplers, a lesson plan booklet and so forth. I already own most of the tips (most, not all), and several piping bags and couplers, but you can never have too many so it didn't really bother me.

Anyhow, Lesson One covers some baking tips, buttercream consistency, how to use decorating bags and tips, levelling and toring the cake, filling the layers, icing the cake (as in, a plain, smooth base on which to decorate, including crumb coating), some piping practice and using piping gel to transfer a pattern.

Lesson Two taught pressure control and dimensional decorating (which basically involves building icing up using continual pressure), and then put all the skills from Lessons One and Two together to make this cake:

Sorry about the terrrrrrrrrible photo - I took it with my phone and didn't realise how badly the skylight had reflected on the cake board until I uploaded the photos just now. I've played with the light balance and contrast but it's still not great. Sorry about that. More to the point, sorry to ME because now I don't have a good photo of a cake that I so fabulously decorated. D'oh! If anyone wants this cake for their birthday let me know - it'll give me a great excuse to take a decent photo.

Stay tuned for Lessons Three and Four, where we learn to fill and ice cupcakes, pipe flowers and decorate another cake with them. But don't hold your breath because I'll be off learning to make cheese next Sunday at Red Hill Cheese, instead of slothing around in my pyjamas and blogging... Mind you, the only reason I'm slothing about in my pyjamas and not out horse riding with my BFF Ness' twin Dean (still haven't figured out which one is the evil twin...) is because I've come down with one heck of a cold, and I didn't think that being sick and spending four hours on horseback on a nine degree day was ever going to end in anything besides perhaps pneumonia! ACHOO!

Oh, one last thing - I made a cut-and-keep butter cake from AWW's Bake for this decorating project. It turned out a little flat for decorating, so I would probably double the recipe and take maybe half a batch of cupcakes out of it and bake the rest to get a taller cake, obviously adjusting baking times accordingly.

125g butter, softened
1tsp vanilla extract
1 1/4 (275g) castor sugar
3 eggs
1c (150g) plain flour
1/2c (75g) SR flour
1/4tsp bicarbonate of soda
1/2c (125mL) milk

1. Preheat oven to 160oC. Grease deep 20cm round cake pan; line base with baking paper.
2. Beat ingredients in medium bowl on low speed with electric mixer until combined. Increase speed to medium; beat until mixture is smooth and changed to paler colour. Spread mixture in pan.
3. Bake for about 1 1/4 hours. Stand cake in pan 5 minutes then turn out onto wire rack to cool.

Note that these instructions are contradictory to what is found on the informational spread a few pages later, entitled Butter Cake Basics. This tells you to beat your butter until pale, add all the sugar and beat until light and fluffy (scraping bowl as required) but without dissolving the sugar, and then adding the eggs one by one until just absorbed. Then you add the flour and milk alternately and mix until the ingredients have just come together, otherwise the mixture gets tough.

Yeah, I don't get why there are two such different sets of instructions so close together either!

Sunday, 22 April 2012

Year of the Cupcake #11: Apricot Upside-Down Cakes (diabetic friendly... allegedly...)

Depending on how often you read my blog, you may be aware that I have decided that I want to get a bit fitter in time for my 30th birthday *shudders* and also eat a bit more thoughtfully. So when my BFF Em and I decided to catch up for afternoon tea, I thought it would be prudent to choose something a little bit lighter on the calories as I knew I'd be going back for seconds ;) I got this from the Australian Women's Weekly site and are supposed to be diabetic friendly. They have a little under 140cal per serve, which isn't **that** bad (provided you only eat one!).

(as I write this, Em hasn't tried them yet but I have, and I think they're okay... but then, it's pretty hard to find me much happier than when I'm eating a bowl of Weetbix with banana or sultanas and a little bit of All Bran on it (I know, I'm a freak), so I'm probaly not the best judge of whether something wholemeal is tasty...)

I know that I'm kind of cheating making this my April entry for my Year of the Cupcake challenge because they didn't come in cupcake wrappers, and they were upside-down, but they were made in a cupcake tin! Huzzah!

INGREDIENTS:
1 tbsp + 3/4c brown sugar, firmly packed
12 canned apricot halves in syrup, drained
2 eggs
3/4c (90g) almond meal
1tsp vanilla essence
1/3c (50g) wholemeal SR flour
1/2c (125mL) skim milk
1/4c (80g) apricot conserve, warmed

Preheat oven to 180oC. Grease 12-hole muffin tin and line bases with little squares of baking paper. Sprinkle sugar (from the 1tbsp) evenly across holes and add 1 apricot half to each, cut side down.

Using an electric mixer, beat eggs and 3/4c sugar in medium bowl until light and fluffy. Stir in almond meal, essence, flour and milk. Divide mixture among pan holes (it will be quite runny).

Bake about 20mins. Stand for 5mins; turn onto a wire rack. Brush apricot conserve over hot cakes. Serve warm or at room temperature.

570kJ; 5g total fat; 19g carbohydrate; 1.5g fibre; 50mg sodium; medium GI.

I ended up brusing on blackberry conserve because it's all we had in the fridge.

They are quite a tasty morsel, as long as you like the natural sweetness of wholemeal flour rather than the overpowering sweetness of white sugar. The texture is rough, but not unpleasantly so, and the squishiness of the apricot keeps it interesting. I dare say that they would be wonderful served hot with a dollop of thickened cream, but I suppose that's defeating the purpose ;)

Sunday, 15 April 2012

The Daring Cooks: Create Your Own Recipe! plus Year of the Cupcake #10 - Chocolate Heartache Cake (GF)

Hello all. I've been a Very Bad Daring Cook of late, between my laziness and my surgery and some other bullplop stuff going on in my life and what have you. This month isn't really an exception, because the entire idea of Daring Kitchen is to extend yourself a bit and actually cook the challenges that they post! I hope the Daring Kitchen gods won't smite me...

I'm a Daring Cook and not a Daring Baker, because I already bake (more than I should!!! *pats food baby*) and I want to extend myself as a savoury cook. But I baked instead of cooking this month because of a last minute dinner invitation from a friend visiting from interstate, and also because I needed to bake cupcakes for my own Year of the Cupcake challenge. Yes, I am aware that I shouldn't leave things until literally the last possible day, but there was Easter and a trip to Brisbane and recovering from surgery and coping with returning to work, so I was sort of painted into a corner.

I had my recipe picked out, and the ingredients ready to go, and instead I ended up going to the exceptionally tasty Mamasita *drools* I have no idea whether it, or Taco Bill's, is closer to authentic Mexican cuisine, but Mamasita beats the pants off Taco Bills. Even though you may have to line up for extended periods of time to get in. Which we didn't, because we opted to have dinner at Nanna O'Clock (5:30pm)!

Our April 2012 Daring Cooks hosts were David & Karen from Twenty-Fingered Cooking. They presented us with a very daring and unique challenge of forming our own recipes by using a set list of ingredients!

Basically what we had to do was pick one from each of the following groups of ingredients and make a savoury meal out of it. I broke the "savoury" rule, but I did make something with three of the ingredients, and I'm really glad that I did because I have offically found THE WORLD'S BEST CHOCOLATE CAKE RECIPE!!! I'm serious. If you don't try this then there's no point in living.

No, I'm not prone to drama at all. Why do you ask?

These were the groups of ingredients:

List 1: Parsnips, Eggplant (aubergine), Cauliflower
List 2: Balsamic Vinegar, Goat Cheese, Chipotle peppers
List 3: Maple Syrup, Instant Coffee, Bananas

And this is the recipe I had originally picked out - meatloaf with BBQ sauce (contained vinegar and coffee), to be served with roasted parsnip. And then I had decided to kick it up a notch and caramelise the parsnip in maple syrup, and serve it with a potato and cauliflower mash, using goats cheese instead of butter to mash it. That obviously didn't happen. I used the Australian Women's Weekly (AWW) Recipe Maker widget to narrow down my recipes, where you just enter the ingredients you wish to use and it spits out recipes. The downside about the widget is that if it can't find a recipe with all the ingredients listed, it will just return recipes that include any of those ingredients and you won't know that until you read through the recipe.

Anyway.

I made Chocolate Heartache Cake, which various sources on the interwebs tells me is from Harry Eastwood's Red Velvet and Chocolate Heartache. Oh! And the interwebs also just informed me that Harry Eastwood is a she and not a he! Anyway, my understanding of the book is that most (all??) of the recipes contain vegies to reduce the amount of fat (butter) required, so theoretically they're not all that bad for you. Except for the part where it contains 200g of honey and 300g of chocolate...

This one contains eggplant, goat cheese and maple syrup.

CHOCOLATE HEARTACHE CAKE omgyoumustmakeitnowitwillchangeyourlife

2 small (400g) aubergines (eggplants)
300g good quality dark chocolate, chopped into small pieces
50g cocoa
60g ground almonds
3 medium eggs
200g clear honey
2tsp baking powder
1/4tsp salt (oops! Forgot to put that in...)
1tsp brandy (I used dark rum as it's all I had in the house *adjusts pirate eyepatch*)

Preheat oven to 180oC. Grease and oil a 23 x 7cm tin/pop cupcake liners in cupcake tin (I made thirteen cupcakes but could probably have squeezed fourteen out of it if I hadn't sampled so many stages of the recipe and accidentally-on-purpose left some batter in the bowl...

Stab your eggplants all over with a fork and put them in a covered microwave safe bowl in the microwave. (I added a wee drop of water because I was paranoid that it would shrivel and catch fire if I didn't, but I don't know if it made any difference. It certainly didn't burst into flames, anyhow!) Microwave for 8 minutes (I flipped it over half way through), remove from microwave and drain any juices in the bowl and let it sit until it's **just** cool enough to handle.

Strip skin off it (you may need to scrape some flesh off the inside of the skin - don't waste the eggplant, but also don't get any bitter skin gunk in it), puree it and then add the chocolate and stir it around. The hot eggplant will melt the chocolate. Stir until smooth. Pick out the big chunks that refuse to melt and eat them to confirm that eggplant and chocolate actually do go well together.

Meanwhile, mix all the other ingredients together and then mix the eggplant mixture in.

For cupcakes, bake for around 20 mins (check at 18mins because mum's oven sucks at regulating temperature). For cake, bake 30 mins. I judged them to be ready when the skewer came out with moist crumbs (but not liquid) stuck to it. I put them on a rack almost immediately but the recipe says to leave the cake in the tin for 15 mins first.

GOAT CHEESE AND MAPLE FROSTING

60g cream cheese
120g goat cheese
1-2tbsp maple syrup (according to your tastebuds, and a darned fine excuse to eat frosting!)
2tbsp icing sugar

Beat cheeses together until light. Add the maple syrup and sugar and beat until mixed well. Spread on cooled cupcakes.

What can I say about these - they are moist and they are dense and they are wonderful. The honey as the sweetener is a much more exotic flavour than the usual old castor sugar that goes into most mud cakes. It seems a little bit Middle Eastern, what with the honey, almond and eggplant; and the lack of butter makes it seem lighter. Perhaps it is the serving size (cupcake!) but I wasn't hit with a sugar rush or that Cake Regret feeling you get with some baked goods. It is altogether out of the ordinary, and all those little quirks in the recipe takes it above and beyond a normal chocolate/mud cake. As Boy would say, it's like Taylor Swift and Rachel Bilson are making love on your tongue. The idea doesn't appeal to me as it does to him, but I think I understand the sentiment...

Please disregard the fact that there are only nine cupcakes on this tray.

Can't imagine why...

Tuesday, 27 March 2012

Year of the Cupcake #9 - St Patrick's Day Irish Soda Bread Cupcakes

I learnt a few things whilst making these cupcakes - one, sometimes savoury flavours can work surprisingly well to balance out sweetness; two, the smell of Johnny Walker in your buttercream frosting is a little unexpected and overpowering until you get used to it, but it's okay in the end with the relatively plain cake; and three, gel colours seem to darken/intensify as they dry, which I wish I'd figured out sooner! Nonetheless, I was quite pleased with the outcome.

I made these for St Patrick's Day, when two friends came over to watch Gone With The Wind with me (thus knocking out two 101 Things challenges in one hit. Whoohoo!). I thought it was quite fitting that the O'Hara family was Irish, that Scarlett's favourite colour was green... and so were the cupcakes. So green, in fact, that you probably wouldn't want your kid to eat that amount of food dye shortly before bedtime!

This recipe is from Gail Wagman's Cupcakes Galore, which is quite an interesting book as it gives you a bit of insight into the science behind baking that had never before been explained to me. Of course, this may be just because I've never read a cookbook from start to finish before, recipes included, but I'm starting to realise that it's quite a valuable (if time-consuming) exercise. It contains other gems such as Beer & Peanuts cupcakes, Apple-Cranberry cupcakes, Brownie cupcakes, Courgette Pine Nut cupcakes, Chocolate Malted Milk cupcakes, Pina Colada cupcakes and Peach Melba cupakes. Quite a mixed bag, mostly inspired by existing foods and drinks. I'm not entirely sure but I think it was bought at QBD books, a discount book seller. One presumes it is also available online.

To the recipe! Makes about 16 cupcakes (I halved the mix)

CUPCAKES:
300g plain flour
1tbsp oatmeal (I used quick oats as they're smaller; I imagine you could finely chop rolled oats)
2tsp baking powder
2tsp bicarbonate of soda (apparently this is used where acidic ingredients such as buttermilk are present)
1tsp salt
125g unsalted butter, room temperature
200g sugar
2 eggs
180mL buttermilk (can substitute normal milk with a dash of white vinegar to make it go chunky... which, eeuw...).
75g dried currents or raisins (if you use raisins, chop them. Or use sultanas)
1tbsp caraway seeds (optional)

1. Preheat oven to 180oC
2. Mix dry ingredients together and set aside
3. Cream butter and sugar until light and fluffy. Add eggs, one at a time, beating well after each addition. Alternately beat in flour mixture and buttermilk. Fold in currents and caraway seeds.
4. 2/3 fill cupcake papers. Bake for 25mins or until a tester inserted into the centre comes out clean (consider baking for a couple of minutes less as mine were a little dry... but then, I did leave them on the bench for quite a while before decorating...). Remove from the oven and cool. Marvel at how they kind of do resemble soda bread.

IRISH WHISKEY FROSTING:
60g unsalted butter, room temperature
300g icing sugar
Pinch of salt
2tbsp Irish Whiskey or Bailey's Irish Cream (I ended up using Johnny Walker as it was the only suitable-ish thing my local bottle-o had in a flash, and there was no way I was buying an entire bottle of good whiskey (which I don't drink) to use 2tbsp!)
Green food colouring and green sugar/sprinkles/whatever for decorating (I made shamrocks out of royal icing. Go me!)

Cream butter, sugar and salt until light and fluffy. Slowly add whiskey (and food colouring, if using) and beat until frosting is of good spreading consistency. Frost cooled cupcakes and decorate as desired.

LITTLE TINY SHAMROCKS:
Royal icing (which I make from 2 eggwhites and approx. 2c sifted icing sugar, but I don't know if that's the right ratio, it's just how I do it! Best you Google it...)
Green food dye

Make royal icing with green food dye - whip until stiff peaks form. I have no idea about the science of this!

Line a tray with baking paper. Using a large plain writing tip, pipe a short line and three blobs as below. It's best if you pipe the top leaf last and drag the tip back towards the middle a little to make it look more like a leaf.

Dry overnight. If possible, flip them over once the top is solid to give the undersides a chance to dry off. They're quite bulky so they may take a couple of days to dry completely (which is only important if you plan on making a surplus of them and storing them - as long as they're solid enough to move they're okay for immediate consumption).

You will need quite a bit of practice to get your hand in at piping. At least, I did, but that may be in part because I haven't done a great deal of piping before, and also because I was still recovering from surgery and didn't have the complete use of my right arm or the ability to raise it above my shoulder or hold my hand on certain angles. All in all I think I did okay! Anyway, I guess it's just testimony to my speshul piping skills but it took this many shamrocks to get eight that turned out well enough to decorate with.

Some turned out quite well.

Others turned out quite... inappropriate for putting on cupcakes. This shape seems to happen to me a lot. I wonder if that means anything...

Decorate as you please. I tried out a few different things but in the end, the simple shamrock and some gold edible glitter (to represent the pot o' gold at the end of the rainbow, of course!) looked the best. Enjoy with a cup of tea to attenuate the effects of the food dye.

Belated St Patrick's Day wishes to ye!

Wednesday, 8 February 2012

Year of the Cupcake #8 - Valentine's Day Gluten Free Vanilla Cupcakes with Chocolate Ganache Filling

I feel like I'm in a bit of a time warp at present - it seems as though my last batch of cupcakes was ages ago, but in reality it was just two weeks. I think that's more of a reflection on the fact that this month I wasn't in a mad rush to bake them before the end of the month. They just sort of happened, because I felt like baking them, and didn't feel like I was under pressure to bake and blog before the end of the month.

It's much more enjoyable cooking when you're not under pressure. I think the fact that I baked 2 things AND completed my February Daring Cooks challenge (no link yet as the post won't be up until the 14th) all in one afternoon, as well as fitting in a swim, a trip to the movies and some decent time spent curled up with a book, and felt tired but not stressed, really tells me that I enjoyed myself on Saturday.

This month, after the roaring success of last month's GF Chai Cupcakes (they rose! They really rose!), I decided to re-work a recipe for vanilla cupcakes that I had previously attempted to adapt to become GF. The recipe was originally from thecupcakeproject but now that I'm into the second incarnation the recipe is resembling the original less and less. I decided that, seeing as Valentine's Day is coming up, I would decorate them accordingly.

I was hoping the changes I made to the recipe would cause them to rise better, but it didn't seem to make a great deal of difference. They were still flattish, but not sunken, so I guess that counts as a partial success! Then again, I am increasingly filled with skepticism about the integrity of mum's oven. I think I may have to get a thermometer to place IN the oven, because I suspect it's five to ten degrees too cool, so for all I know this recipe could actually be a roaring success. They tasted less like vanilla, too, although in hindsight that's probably more to do with the fact that I loaded them up with chocolate ganache! I dropped a couple when I was turning them out of the pan, which meant they were squashed, so I had to eat a squashed one while it was still hot (you know, in the name of quality control ;) and it did taste like vanilla, so perhaps next time I use this recipe I will ice it with something significantly more subtle.

Also, I apologise for the photos - fading light + having no idea how to photograph glossy brown things in red wrappers = terrible photos!!! If anyone can tell me how to improve this situation I would be much obliged :)

THE CUPCAKES:

Note that the below flowchart is how I normally copy recipes out by hand, so I thought I'd give it a whirl today. If you're struggling with the format, I have written notes below. Each set of ingredients is referred to as "set 1", "set 2" etc. in order down the page.

Now, for a favour - my Statcounter tells me there are regular readers all over the world and I value your input, so PLEASE comment and tell me whether you like this method of copying out recipes, or you prefer the good ol' fashioned method. Everyone who comments will go into a draw to win baked goods (home-made if you're within Australia, or a packet of Tim-Tams if you're outside of Australia). The draw will close on the 17th of February and the winner will be announced shortly thereafter. Get commenting!
And to the notes on the recipe -

Preheat oven to 180oC and line cupcake trays with cupcake liners (makes about 22 Australian cupcakes, give or take).

Combine Group 1 ingredients in a small bowl until vanilla seeds are evenly distributed throughout the sugar. Smells divine!

Whip egg whites (Group 6) until stiff peaks form. Set aside.

Mix Group 2 ingredients together in a large bowl and add combined Group 1 ingredients.

Add Group 3 ingredients to the large bowl and mix until resembling bread crumbs.

Mix Group 4 ingredients together in the bowl that originally contained the sugar/vanilla mixture until even in texture. Add to large bowl and mix well.

Add Group 5 ingredients slowly to the large bowl, mixing on low (you don't want to over-work GF products).

Fold half of Group 6 into the large bowl until evenly mixed, then fold the other half in.

Immediately scoop into cupcake wrappers (half fill) and bake for 14-16 minutes.

Note that the original recipe said 175oC for 14 minutes, but I ended up turning the oven up by ten degrees and baking for an extra five minutes or so once the 14 minutes was over. I think this has more to do with the seals on the oven than the accuracy of the recipe!

THE CHOCOLATE GANACHE:
300mL of thickened cream (the sort you use to whip)
300g chocolate, finely chopped.

Note - I used 200g of dark chocolate and 100g of milk chocolate as this is what I had on hand. Milk chocolate can help take the edge of dark chocolate as dark chocolate on its own makes a very rich ganache. And I just realised why my ganache turned out so sloppy - I probably added a little less chocolate than I had originally intended (oops!), and  the closer to a 1:1 ratio of cream to chocolate, the sloppier the mix and the softer it will remain, even when refrigerated. For a stiffer mix, add more chocolate

Heat cream until bubbles form, dump in the chopped chocolate (make sure it is all submerged), let it sit for a few minutes and then stir it until it forms a smooth mixture.

Divide mixture in two. Mixture #1 will be cooled and then whipped, and mixture #2 will be cooled until it thickens so that it is spreadable but not uruly, but do not cool as much as mixture #1. I am impatient so I cooled mixture #1 in the freezer and stirred it every 5 to 10 minutes until it was still just pliable but a little on the stiff side, then whipped it with the whisk attachment on the Kenwood.

While I was daydreaming about ganache on the bus yesterday (as one does!) I realised that this would make a very good chocolate mousse replacement for people who are freaked out at the thought of raw egg (which is in normal, home-made chocolate mousse. I'm sorry if you didn't already know that and it has ruined your love for it!). Aaaanyway...

I then attempted to use this, which I got for my birthday last year from Kirsti. It's a hoover-joover for making holes in cupcakes and then filling them with something yummy.

I don't think I was using it correctly, but it still gave me a good-shaped hole.

I only cut about half way through the cupcake and then lifted the little cake round out with an old-fashioned sugar/jam spoon with a large, rounded end (think soup spoon, but smaller, and decorative)...

...filled them with a spoonful of whipped ganache...

...and then smooshed the tops back on.

Next time I will definitely consider putting the ganache in a piping bag and injecting the cupcakes with the filling - it would probably give a nicer finish. You know, provided the cupcake didn't explode ;)

And here are the super-cute heart-shaped sprinkles and red jimmies I used, available at bakingpleasures.com.au (they don't know I exist, except that by the end of the year I will probably have just about paid off their mortgage!), which is also where I got the red and black cupcake wrappers from.

And here they all in rows.

And because it was getting dark, and because I also think I need glasses now, I have included another photo because one seemed too blurry. Except now that that one looks blurry, too... yep, time to visit the optometrist!

Don't forget to comment on the recipe format, even if you don't have a Google account. Thanks! :)